How to set up a TeamSpeak 3 server on Debian / Ubuntu
In times of the global pandemic, it is all the more important to keep in touch with other people. In this tutorial, I'm going to walk you through installing and setting up a TeamSpeak 3 server on your Linux server for friends and family.


Introduction
In times of the global pandemic, it is all the more important to keep in touch with other people. In this tutorial, I'm going to walk you through installing and setting up a TeamSpeak 3 server on your Linux server for friends and family.
Prerequisites
- A Debian or Ubuntu based machine that can be accessed by the people you want to interact with
- Internet connection
- Root access or elevated privileges (via sudo)
Installation & Configuration
Step 1: Update the Linux system
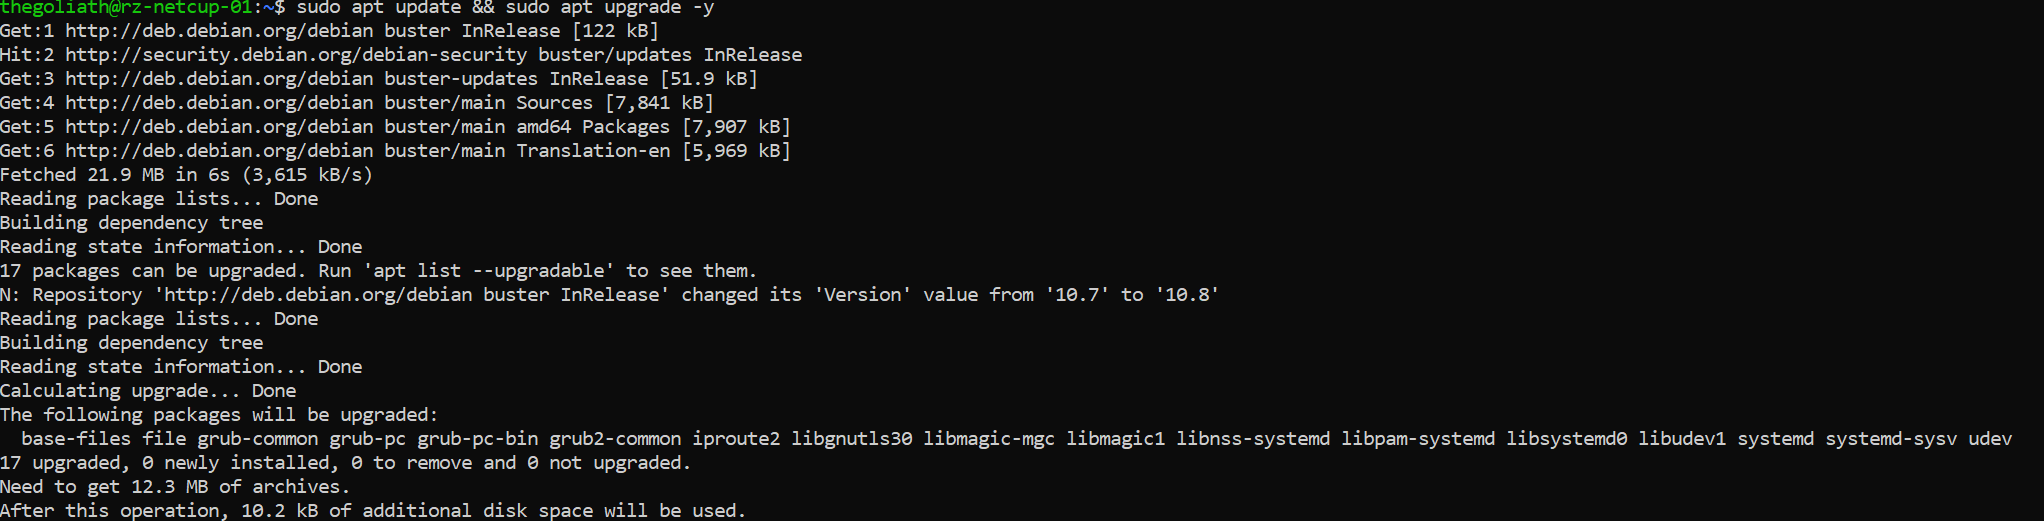
Before setting up an application on your Linux server, it is a good idea to upgrade the system in advance to be up to date and not to break anything after upgrading the server after setting up TeamSpeak. To make sure we are up to date, we call
$ sudo apt update && sudo apt upgrade -yand the upgrade process should start.
It is also worth installing these upgrades automatically and unattended. I've already written a guide on the subject.
After a successful upgrade, it is recommended that you reboot the system to load the new Linux kernel and get the services up and running with the updated binaries.
Step 2: Create a user for the TeamSpeak 3 daemon
We need to create a separate, non-privileged user for our TeamSpeak 3 server so that no one can wreak havoc in the event that the TeamSpeak 3 binary has a unknown vulnerability.
For this purpose we will create a new user named teamspeak with the directory /opt/teamspeak as the home directory, without the option to log in (for more security) and the display name "TeamSpeak 3". Simply call the command
$ sudo useradd -m -d /opt/teamspeak -s /usr/sbin/nologin -c "TeamSpeak 3" teamspeakand the new user will be created.

Step 3: Download and unpack the TeamSpeak 3 Server files
Now we need to work with the newly created teamspeak user. To use it we have to run:
$ sudo -u teamspeak /usr/bin/bashand then cd ~ to get to our designated home directory for the server (Use pwd to check that we are in the /opt/teamspeak directory).
Now we need to take a look at the official TeamSpeak 3 download page (for the server). Since my system is a 64-bit system, I'll be choosing the 64-bit package. If yours is somehow still 32-bit, then go for the 32-bit version. If you don't already know what architecture your Linux kernel uses, you can run uname -a to see if you are running a 32- or 64-bit kernel.

I always recommend using the latest version available as the latest features and security patches will only be available there.
For me the latest server version is 3.13.3. So I will download it via:
$ wget https://files.teamspeak-services.com/releases/server/3.13.6/teamspeak3-server_linux_amd64-3.13.6.tar.bz2into the current directory and then extract it via tar xfj teamspeak3-server_linux_amd64-3.13.6.tar.bz2 -C /opt/teamspeak to /opt/teamspeak.
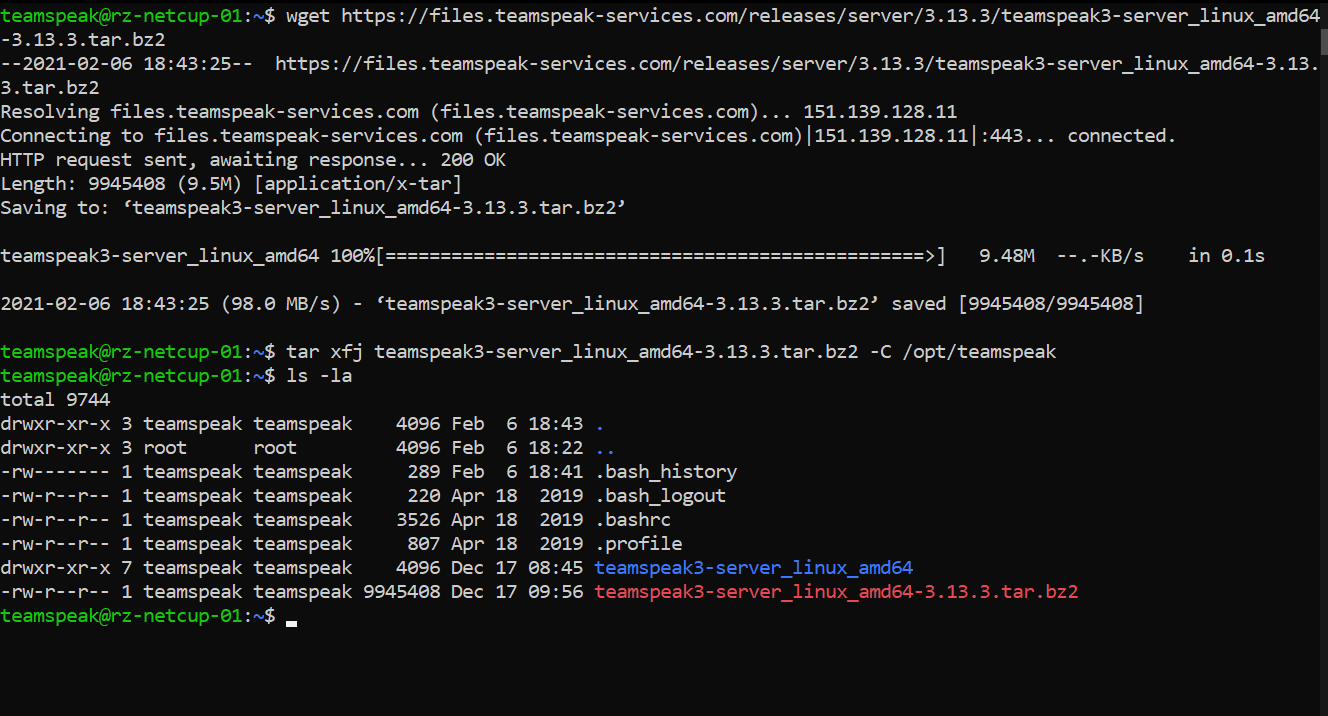
We'll now move the files to the /opt/teamspeak folder to clean up so we don't have an unnecessary subfolder and delete the downloaded archive that is no longer needed. To do this, we carry out an:
$ mv /opt/teamspeak/teamspeak3-server_linux_amd64/* /opt/teamspeak && rm -r /opt/teamspeak/teamspeak3-server_linux_amd64 teamspeak3-server_linux_amd64-3.13.6.tar.bz2Note that you have to change the last file name (teamspeak3-server_linux_amd64-3.13.6.tar.bz2) to your current TeamSpeak version / archive name.
Step 4: Accept the license in advance and start the server
TeamSpeak comes with a license that you must accept before you can freely run the server. Make sure you made yourself familiar with the terms of use before proceeding with the next step. We will add a file that tells the TeamSpeak 3 server that we have already read and accepted the license agreement. It's as easy as calling:
$ touch /opt/teamspeak/.ts3server_license_acceptedNow we can finally test out our server by starting it with the designated start script:
$ /opt/teamspeak/ts3server_startscript.sh start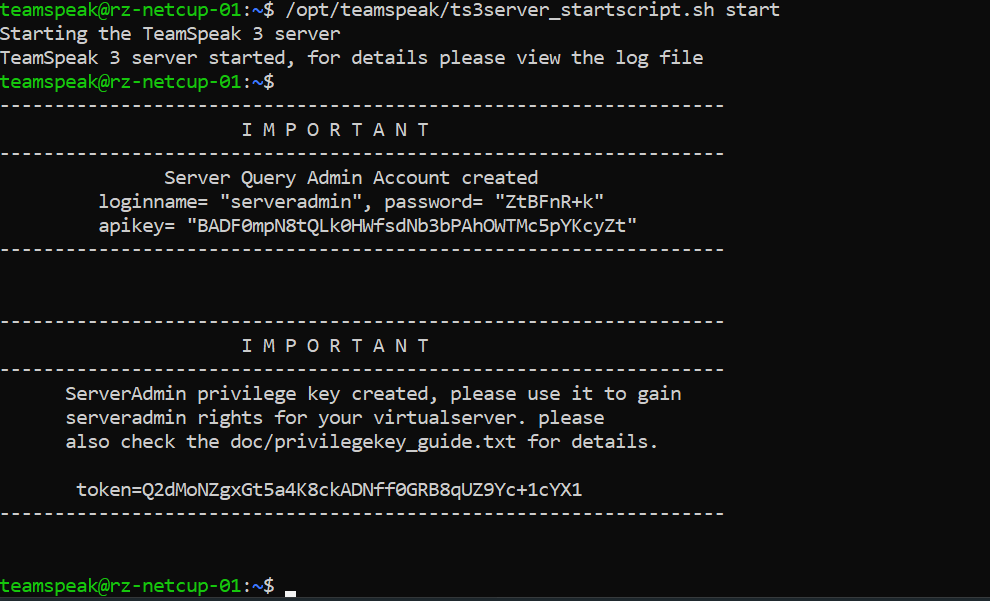
Pressing Enter will take us back to our command line interface. Make sure you have written down these tokens and credentials and keep them safe. I will reset the server after this tutorial (just in case someone wonders why I would show the credentials).
Step 5: Create the systemd-unit file
Now we need to stop the server again as we are using a systemd-unit file to start the TeamSpeak 3 server daemon on startup instead of playing around with this script after every restart. Invoke
$ sudo nano /lib/systemd/system/teamspeak3server.serviceas your regular user and then paste the following into the empty file:
[Unit]
Description=TeamSpeak 3 Server
After=network.target

[Service]
WorkingDirectory=/opt/teamspeak/
User=teamspeak
Group=teamspeak
Type=forking
ExecStart=/opt/teamspeak/ts3server_startscript.sh start inifile=ts3server.ini
ExecStop=/opt/teamspeak/ts3server_startscript.sh stop
PIDFile=/opt/teamspeak/ts3server.pid
RestartSec=15
Restart=always

[Install]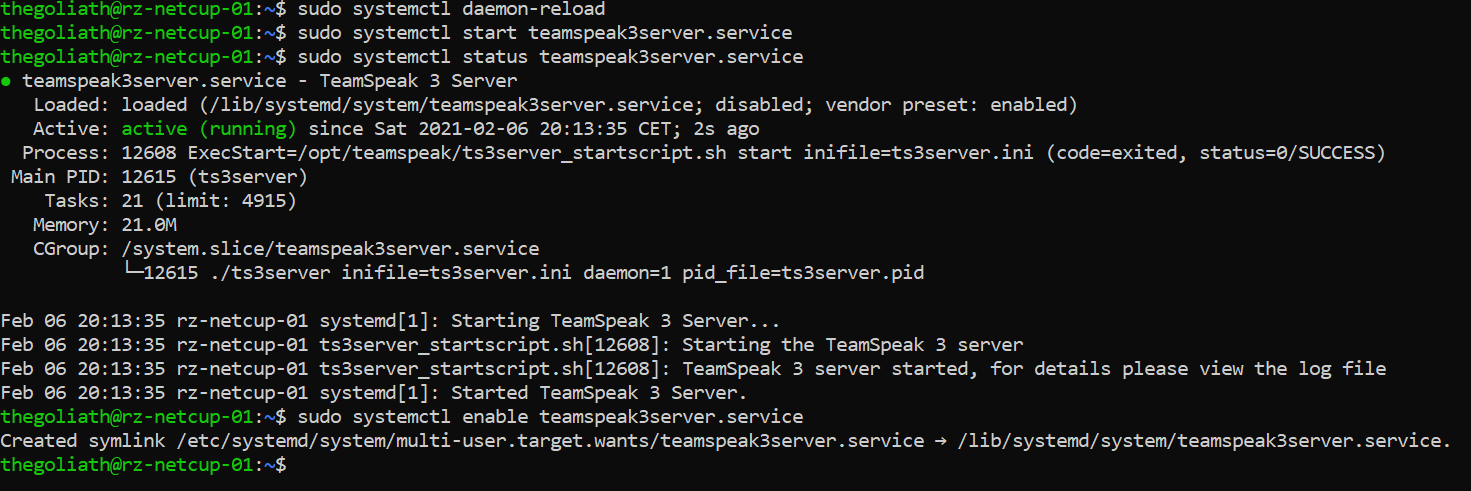
WantedBy=multi-user.targetNow let the systemd daemon recognize the newly created service file by calling sudo systemctl daemon-reload. And it's time to finally start the server. Use sudo systemctl start teamspeak3server.service. Use the sudo systemctl status teamspeak3server.service to check whether the server is up and running (If you are in the expanded service status view, press q). If you want to enable the TeamSpeak 3 server to start when your Linux server starts up, go for a sudo systemctl enable teamspeak3server.service and your TeamSpeak server will be available as soon as your server is up.
Our server is now ready for use. We now have to initialize it with our TeamSpeak client.
Step 6: Initial Setup and connection to the server
Finally, we have to connect to the server once to provide the authorization key.
To do this, go to the TeamSpeak 3 client application and click on "Connections" and then on "Connect".
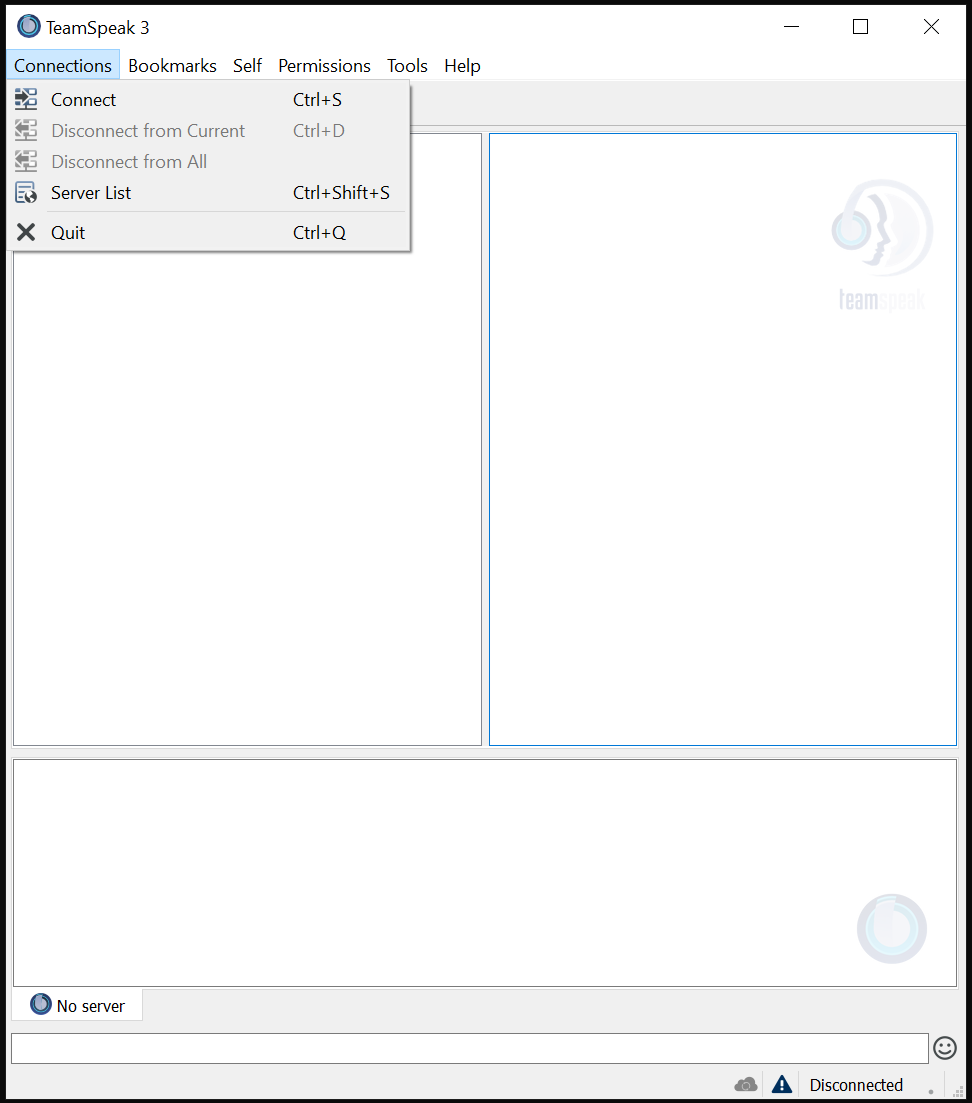
Now enter the IP address or the domain name of your newly set up server as well as the desired nickname and click on "Connect".

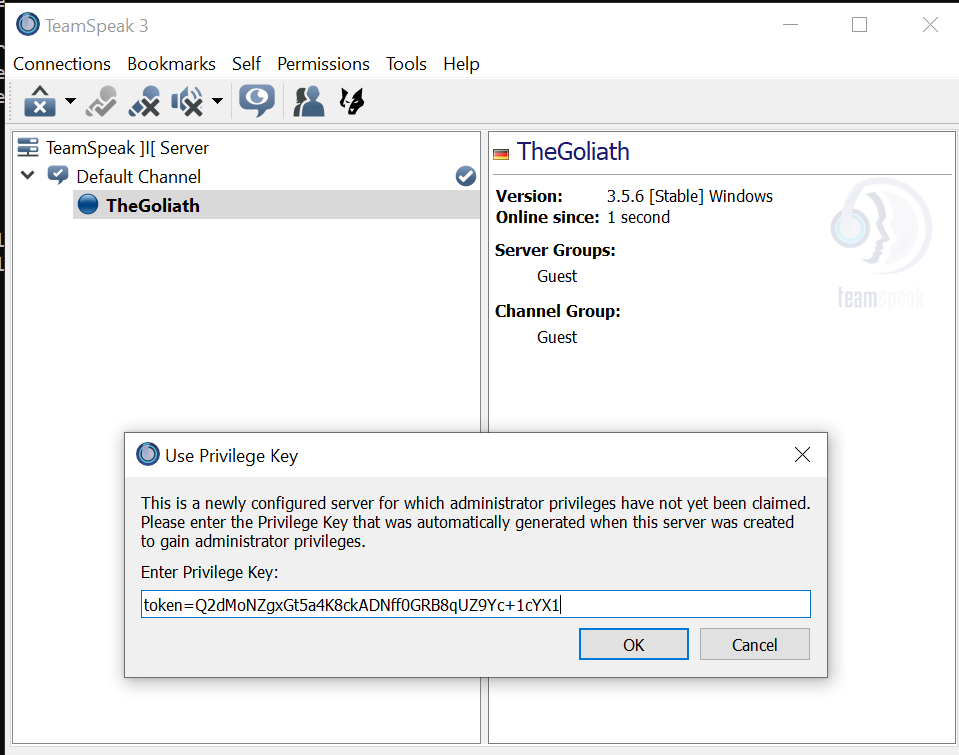
You should now be greeted with the "Use Privilege Key" window where we need to paste our ServerAdmin Privilege Key.
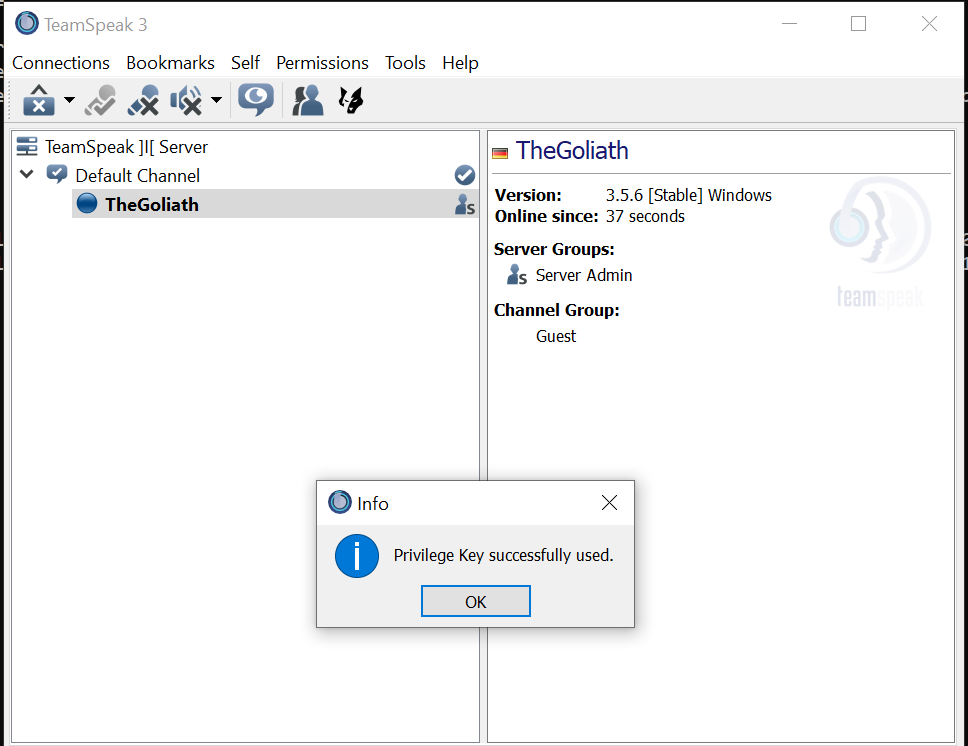
As soon as this is done, we will finally have our server up and running. Last but not least, hit the "OK" button and we're good to go.
Conclusion
Congratulations, you did it! Your own TeamSpeak 3 server is now operational and you can tell your friends and family to jump on it and have a chat. Remember to update the server regularly by extracting the contents of newer versions to the /opt/teamspeak directory while the server is stopped. Now call the well-known command
$ sudo systemctl start teamspeak3server.servicein order to restart the TeamSpeak 3 server.