How to enable automatic & unattended upgrades on Debian / Ubuntu
The security of your servers should be of the utmost importance to any system administrator. Installing the latest security patches on your systems is an essential part of keeping your computers secure and preventing automated attacks with known vulnerabilities that put your systems at risk.


Introduction
The security of your servers should be of the utmost importance to any system administrator. Installing the latest security patches on your systems is an essential part of keeping your computers secure and preventing automated attacks with known vulnerabilities that put your systems at risk. However, updating the latest patches can be a real problem if you manage a lot of machines or if you just don't want to log in every two weeks to manually update your systems to the latest patch level. Almost all Debian-based systems (including Ubuntu) offer a package called unattended-upgrades which, if properly configured, can be used to upgrade the system for you. You can either just install security updates, perform a full system upgrade, or even install packages that are in the testing phase - all automatically.
But there is a catch. Critical infrastructures like your Internet backbone, VPN gateway, etc. should be updated manually or ONLY automatically install security patches, as downtime and messing around with broken configuration files can ruin your day. You should evaluate for yourself whether and to what extent your server should receive automatic updates. I recommend security updates for every system. If the system isn't that critical, I would consider installing pending updates automatically, which isn't that much of a hassle.
Prerequisites
- A Debian / Ubuntu system with the latest updates installed
- Internet connection
- Root access or elevated privileges (via sudo)
Installation & Configuration
Step 1: Install unattended-upgrades & optional packages
Some versions of Debian (9+) and Ubuntu versions come with the unattended upgrades and apt-listchanges packages preinstalled. To make sure both packages are really installed on our hard drive, we should double check. First, make sure the system is up to date by invoking
$ sudo apt update && sudo apt upgrade -y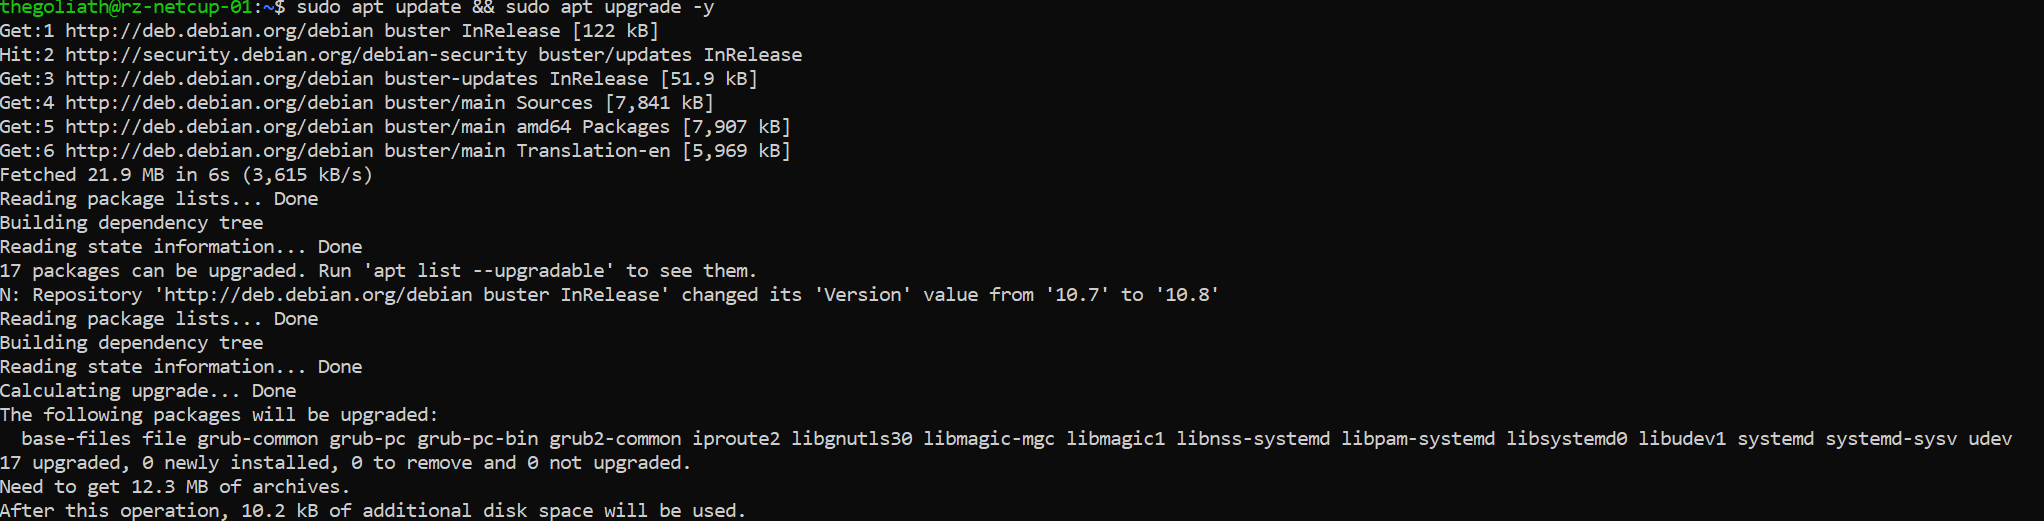
It is recommended that you monitor the latest changes of packages made available by the package maintainers of your distribution. Therefore, we should also install the apt-listchanges package that can be configured to notify us when changes that we should be aware of are made to the system. It does this by sending us these changes by e-mail or into the system-internal mailbox of the desired UNIX user.
Install them packages by invoking the following command:
$ sudo apt install unattended-upgrades apt-listchangesStep 2: Configure unattended-upgrades & apt-listchanges
Next we need to configure the configuration file of the unattended upgrade package, which location is /etc/apt/apt.conf.d/50unattended-upgrades.
We need to choose which updates we want to install. The lines that begin with a double slash (//) are not used by unattended-upgrades because they serve as comments for the configuration file. Therefore, to "activate" a line, we need to remove the double slash (//).
Step 2.1: Selecting the package groups we want to update
Use the editor of your choice to edit the configuration file. For beginners, I would recommend nano, which comes standard on most systems. Open the configuration by calling
$ sudo nano /etc/apt/apt.conf.d/50unattended-upgrades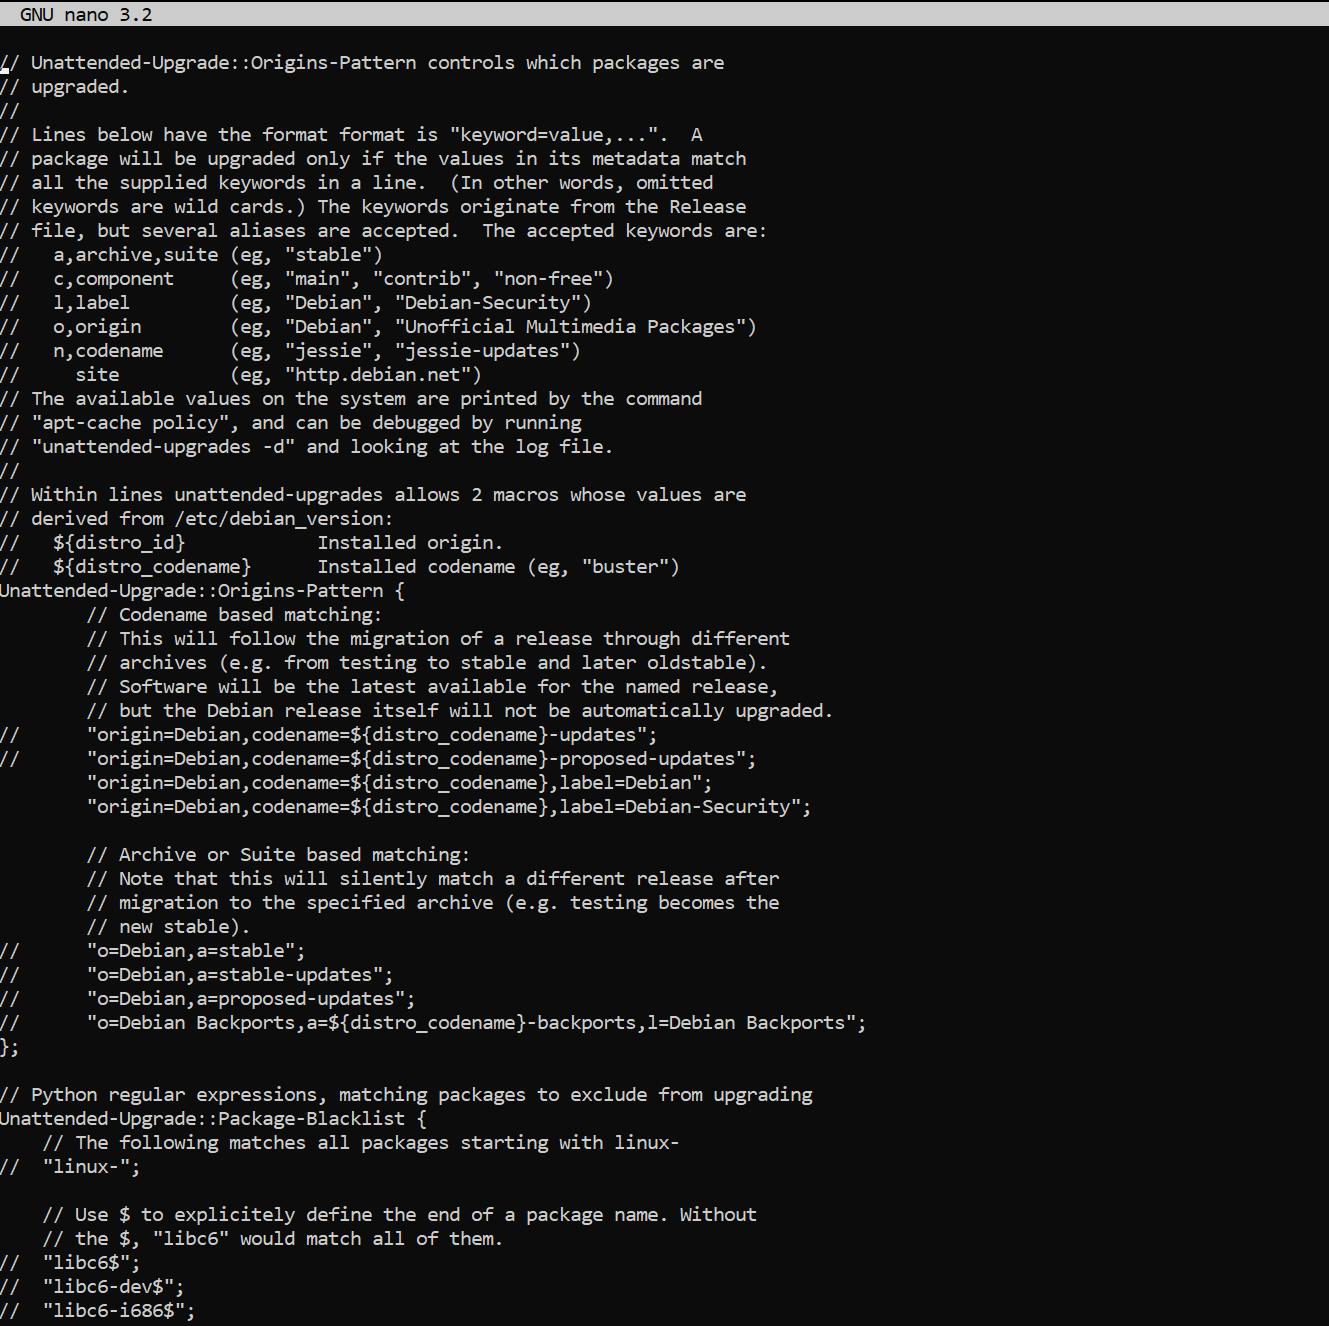
We can control what is automatically updated by uncommenting and uncommenting these lines in the configuration block, starting with Unattended-Upgrade::Origins-Pattern. By default, only security updates are occasionally installed for your system. To enable updates from other updates we have to uncomment them respectively.
But first we want to make sure everyone knows what is behind these different repositories. The Debian project itself provides a good explanation.
"origin=Debian,codename=${distro_codename},label=Debian-Security";- official Debian repository for frequent security updates"origin=Debian,codename=${distro_codename}-updates";- official Debian repository for changes that cannot wait for the next point release, packages are also added to StableProposedUpdates for inclusion in the next point release"origin=Debian,codename=${distro_codename}-proposed-updates";- official Debian repository for upcoming point releases (security and important bug fixes every ~2 months)"o=Debian Backports,a=${distro_codename}-backports,l=Debian Backports";- more recent versions of some packages, compatible with DebianStable.
Step 2.2: Configure the update schedule
By default we need to add the 20auto-upgrade file to our Debian installation as the file has not yet been created. To do this invoke:
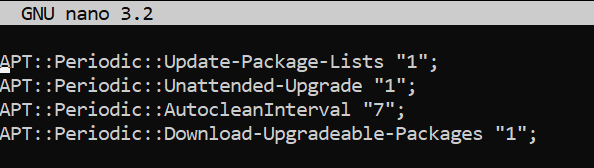
$ sudo nano /etc/apt/apt.conf.d/20auto-upgradesand add the following parameters as desired.
By default it looks like this:
APT::Periodic::Update-Package-Lists "1";
APT::Periodic::Unattended-Upgrade "1";
APT::Periodic::Update-Package-Lists- This option allows you to specify the frequency (in days) with which the package lists are updated.APT::Periodic::Download-Upgradeable-Packages- When enabled, the script will perform an unattended upgrade on a daily basis.APT::Periodic::AutocleanInterval- This controls how often outdated packages are removed from the APT cache. This keeps the APT cache a reasonable size and means you don't have to worry about this task.APT::Periodic::Download-Upgradeable-Packages- Frequency (in days) for downloading the actual packages.
Our desired configuration updates package lists, downloads packages, and installs available upgrades on a daily basis. Meanwhile, the APT cache is cleaned every 7 days:
Step 2.3: Enable email reporting for package changes (optional)
We want to enable email reporting as some changes in the updated packages may break our configurations and therefore some services may fail. To reduce the length of downtime, it is a good idea to send yourself some information about the changes made to your system.
To do this, we have to look in our file /etc/apt/apt.conf.d/50unattended-upgrades again and find the line //Unattended-Upgrade::Mail "". Now uncomment the line and change the value to your own username or your e-mail address if you have already configured a suitable mail system.

Step 3: Verify that everything works!
Finally, we need to verify that our unattended upgrade service is working. To do this, we can test our configuration by invoking it with a dry run of unattended upgrades:
$ sudo unattended-upgrades --dry-run --debug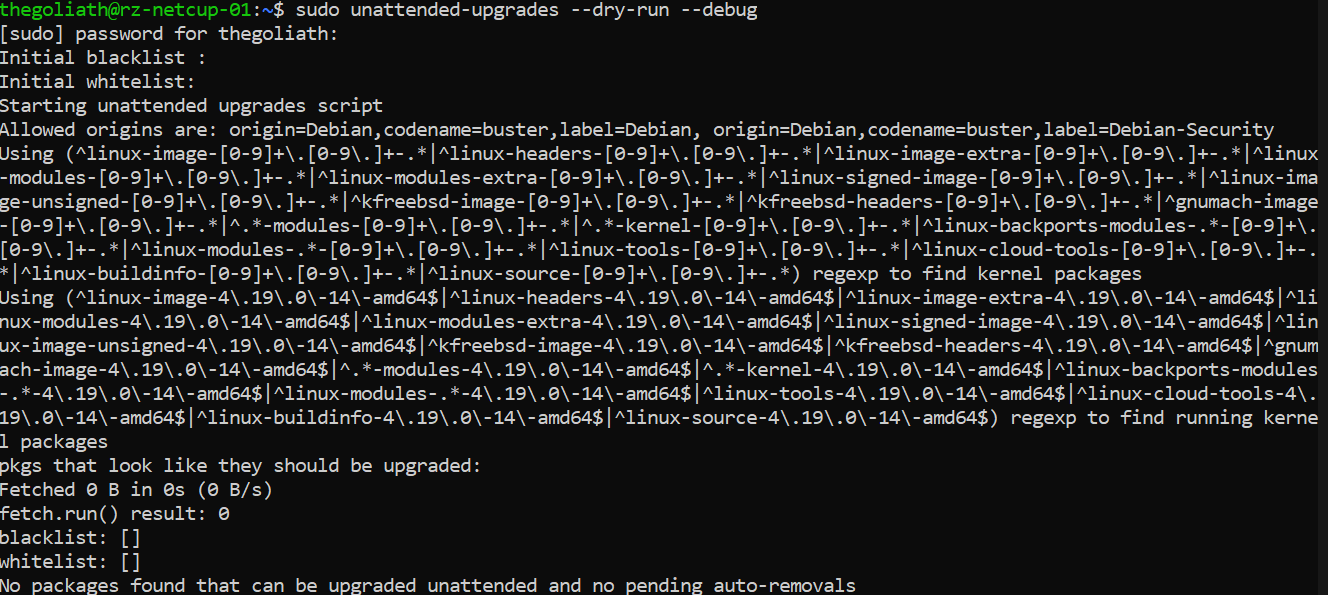
And we're done!
Cheers,
Felix