Installing Debian 10 Buster onto a VPS (netcup)
Debian 10, also known as Buster, was released almost two years ago in 2019. However, it is the newest and most up-to-date version of the Linux distribution. As with any version of Debian, Buster had some high performance tests to be as stable and secure as possible.

# Here are some netcup coupon codes. It won't cost you a penny more to use them. I just get a small percentage credited by netcup for the particular product so I can fund this blog here :)
36nc17020388670 	Coupon 5 Euro (new customers, no domains)
2915nc17020389730 	RS 1000 G9.5 3M discount
2916nc17020389690 	RS 2000 G9.5 2M discount
2917nc17020389640 	RS 4000 G9.5 2M discount
2918nc17020389610 	RS 8000 G9.5 1M discount
3062nc17020389580 	VPS 1000 G10 1M discount
3063nc17020389490 	VPS 2000 G10 1M discount
3064nc17020389460 	VPS 3000 G10 1M discount
3065nc17020389430 	VPS 4000 G10 1M discount
3066nc17020389380 	VPS 6000 G10 1M discount
3067nc17020389300 	VPS 8000 G10 1M discount
Coupon codes
Introduction
Debian 10, also known as Buster, was released almost two years ago in 2019. However, it is the newest and most up-to-date version of the Linux distribution. As with any version of Debian, Buster had some high performance tests to be as stable and secure as possible. At the time of writing, the latest version of Debian 10 is 10.7 (released December 2020).
Our goal is to install Debian 10 Buster on our own Virtual Private Server (VPS). I will walk you through installing Buster on a Netcup VPS, but the process shouldn't be very different from other hosting providers.
Prerequisites (minimal)
- RAM: 256MB or more (Recommended: at least 512MB)
- Hard Drive space: 2GB or more (I recommend at least 10GB)
- CPU: 1GHz Intel Pentium should do the job but don't expect it to be blazing fast then ;)
Installation procedure
Step 1: Downloading the installation ISO file
Netcup already has up-to-date installation images for common distributions such as CentOS, Debian, Ubuntu etc. We will use them for our installation. If you want to use your own installation image, visit the official Debian website to grab a copy of the image and upload it to your hoster's FTP server.
Step 2: Booting the ISO
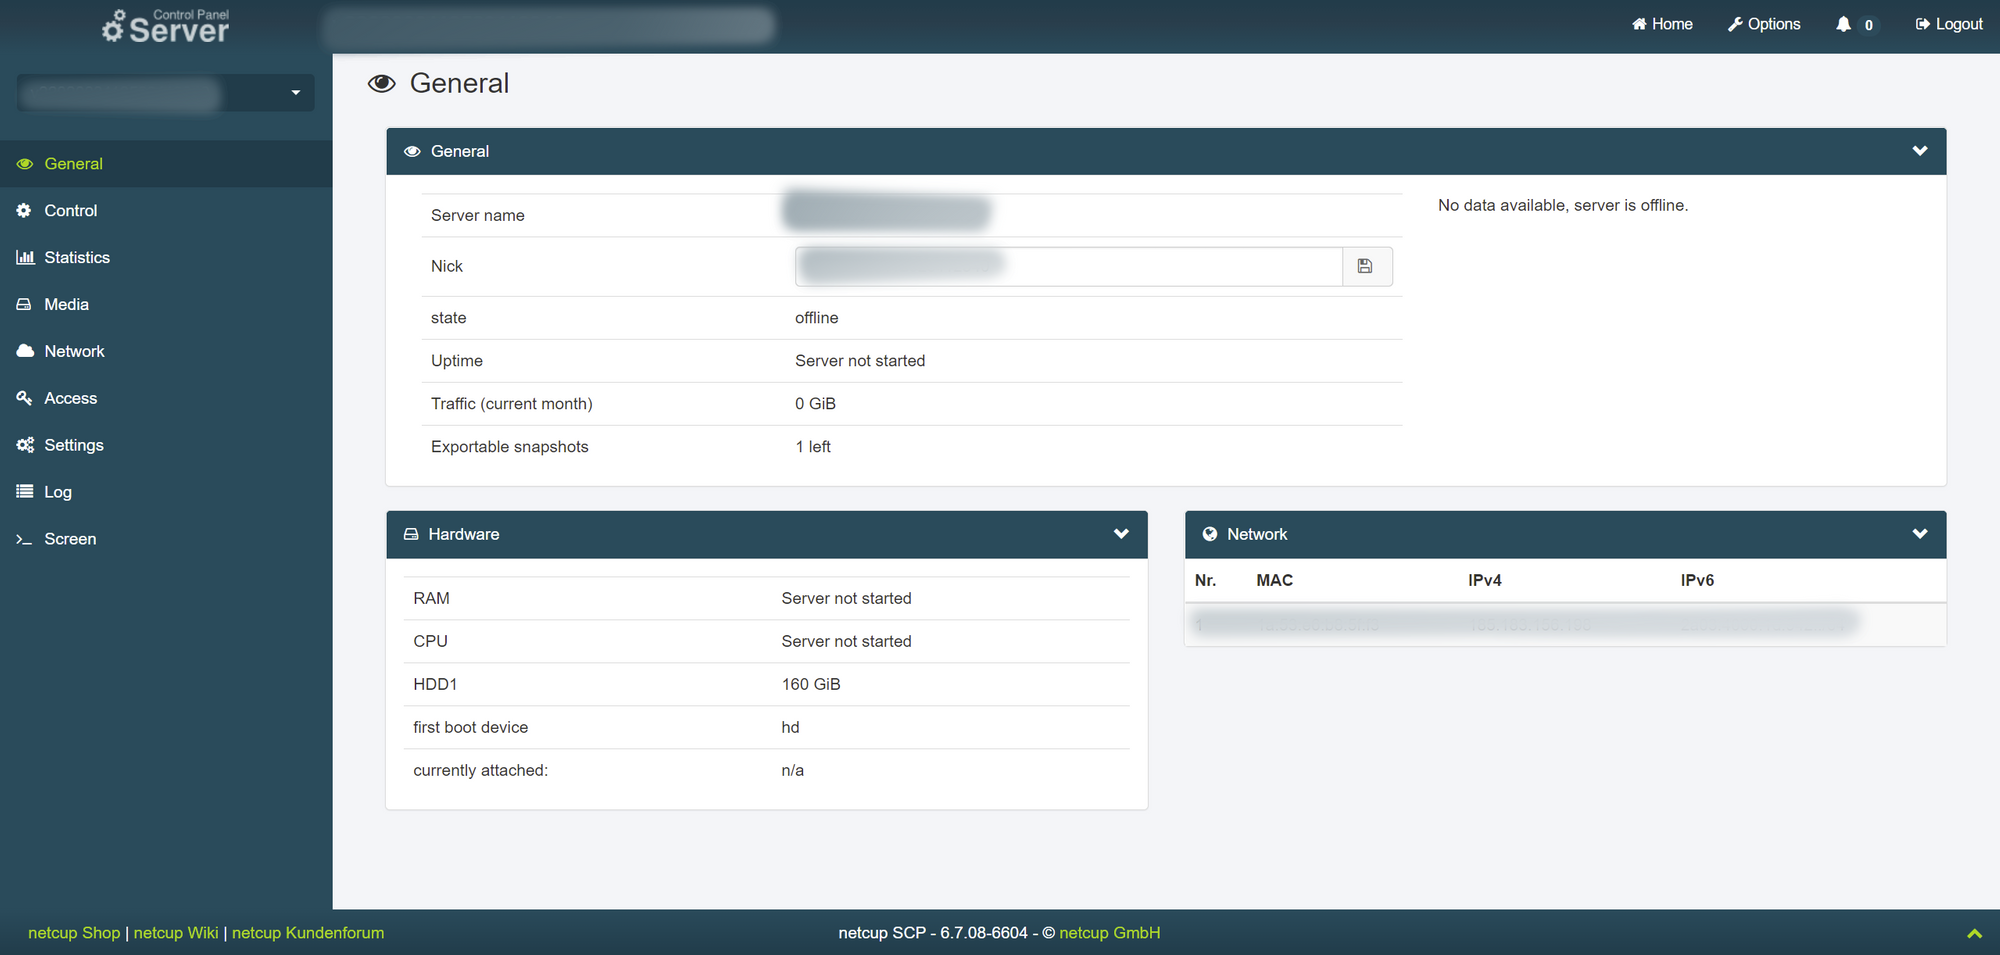
If you log in to the server control panel (SCP) of netcup (servercontrolpanel.de) with your login information, you will be greeted with the "General" overview of your rented server (Fig. 1).
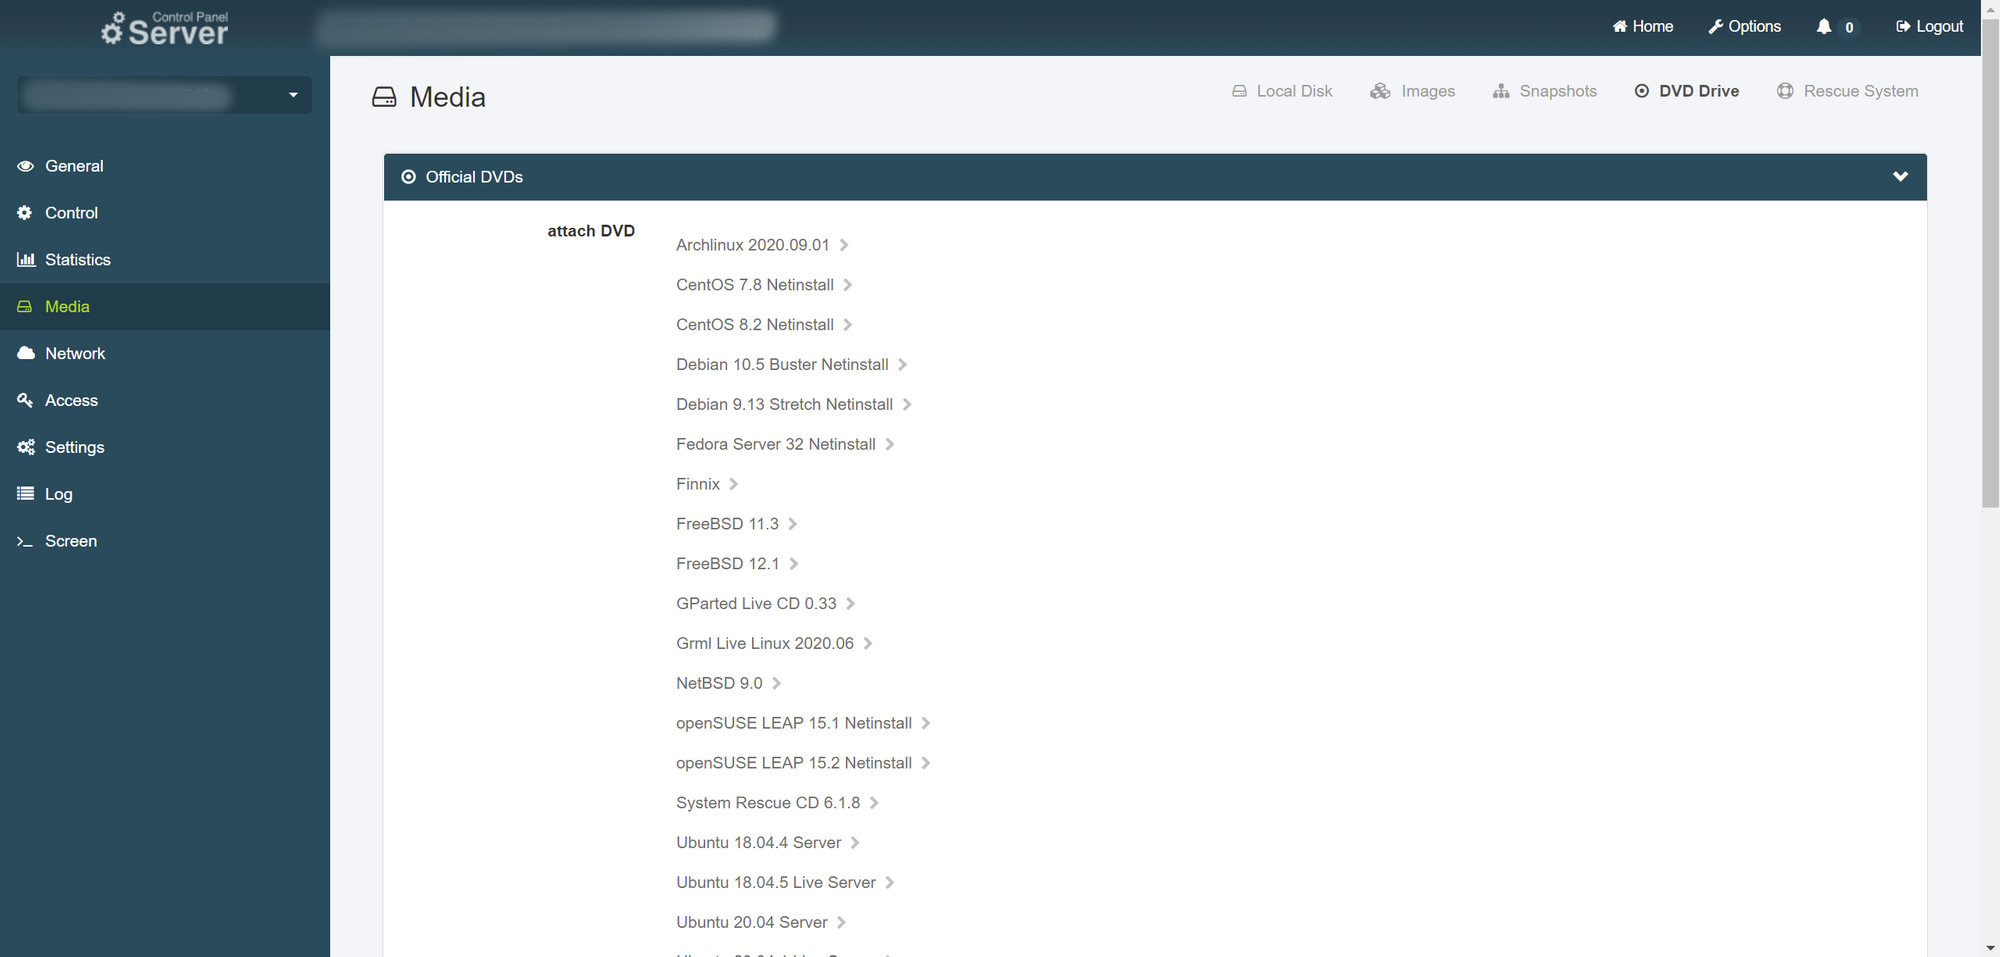
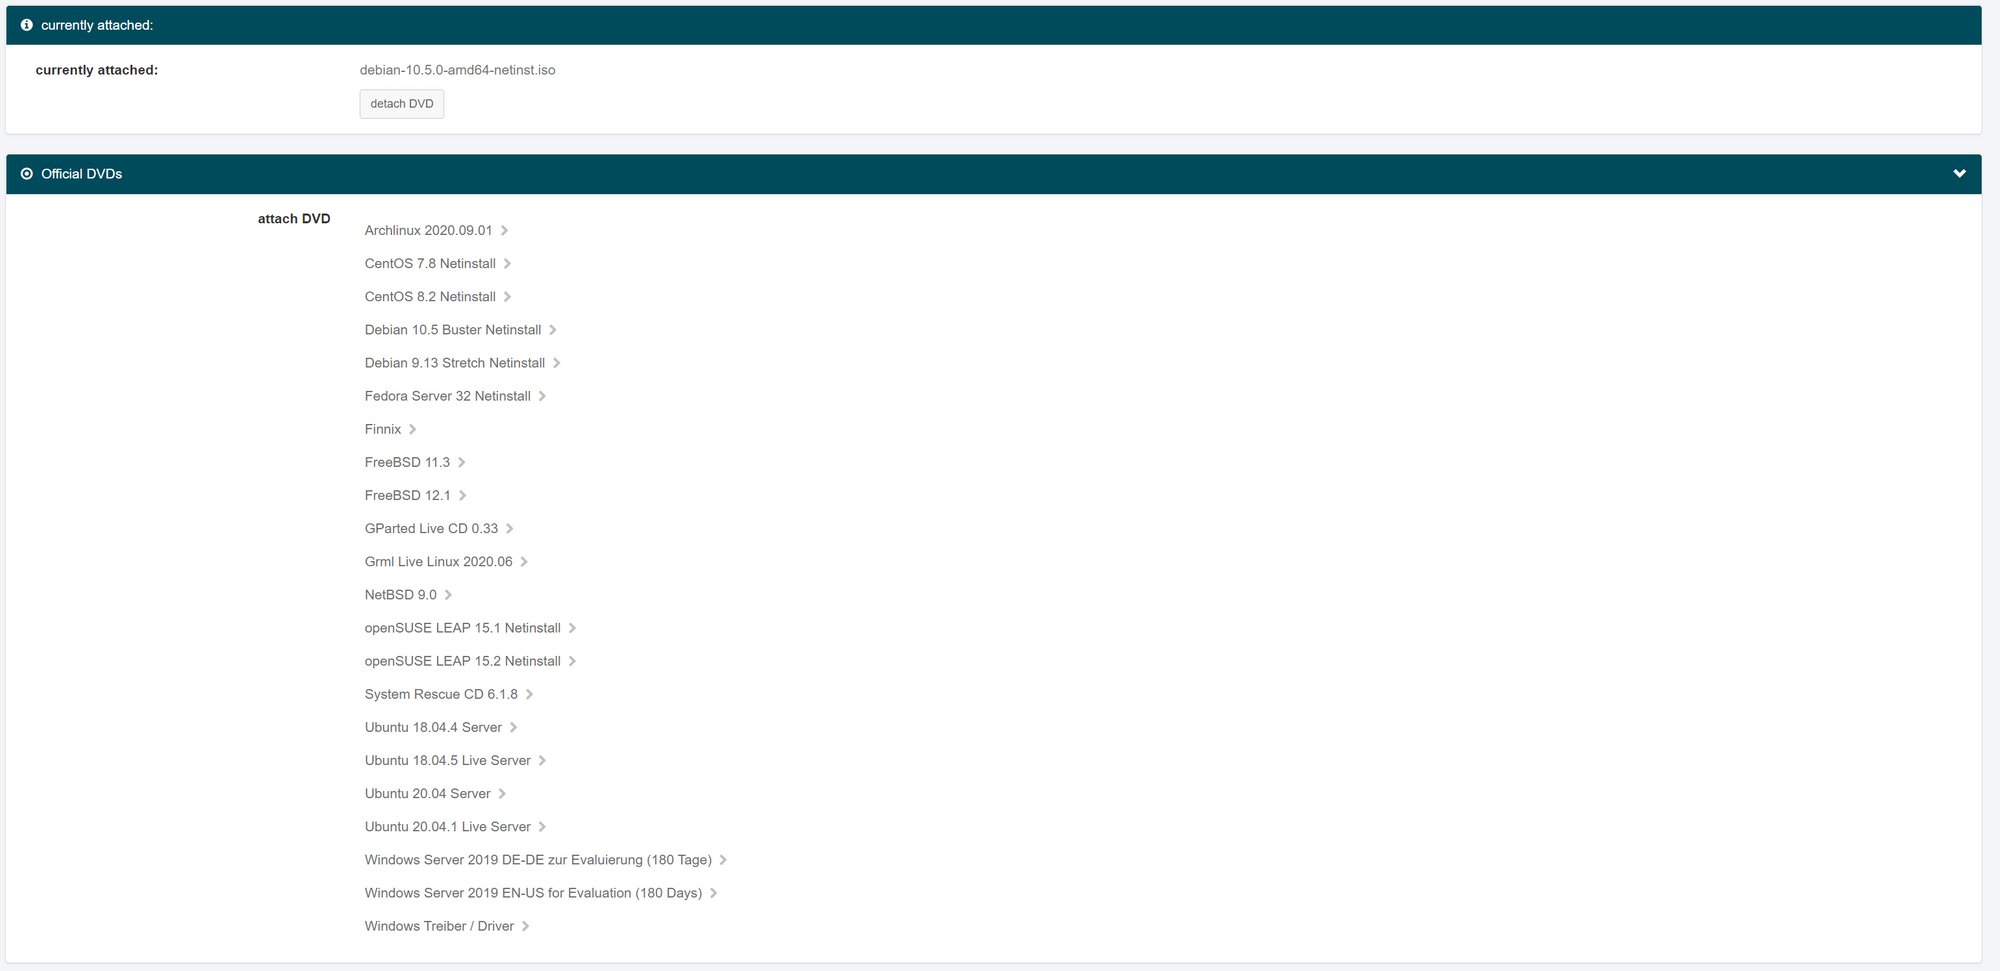
From there we need to go to the "Media" section (Fig. 2) where we will go to the "DVD Drive" menu and select the Debian 10.x Netinstall medium.
You can also choose your own installation media after uploading it to the FTP server. Next we have to set the boot mode to DVD (Fig. 3) and attach the DVD.

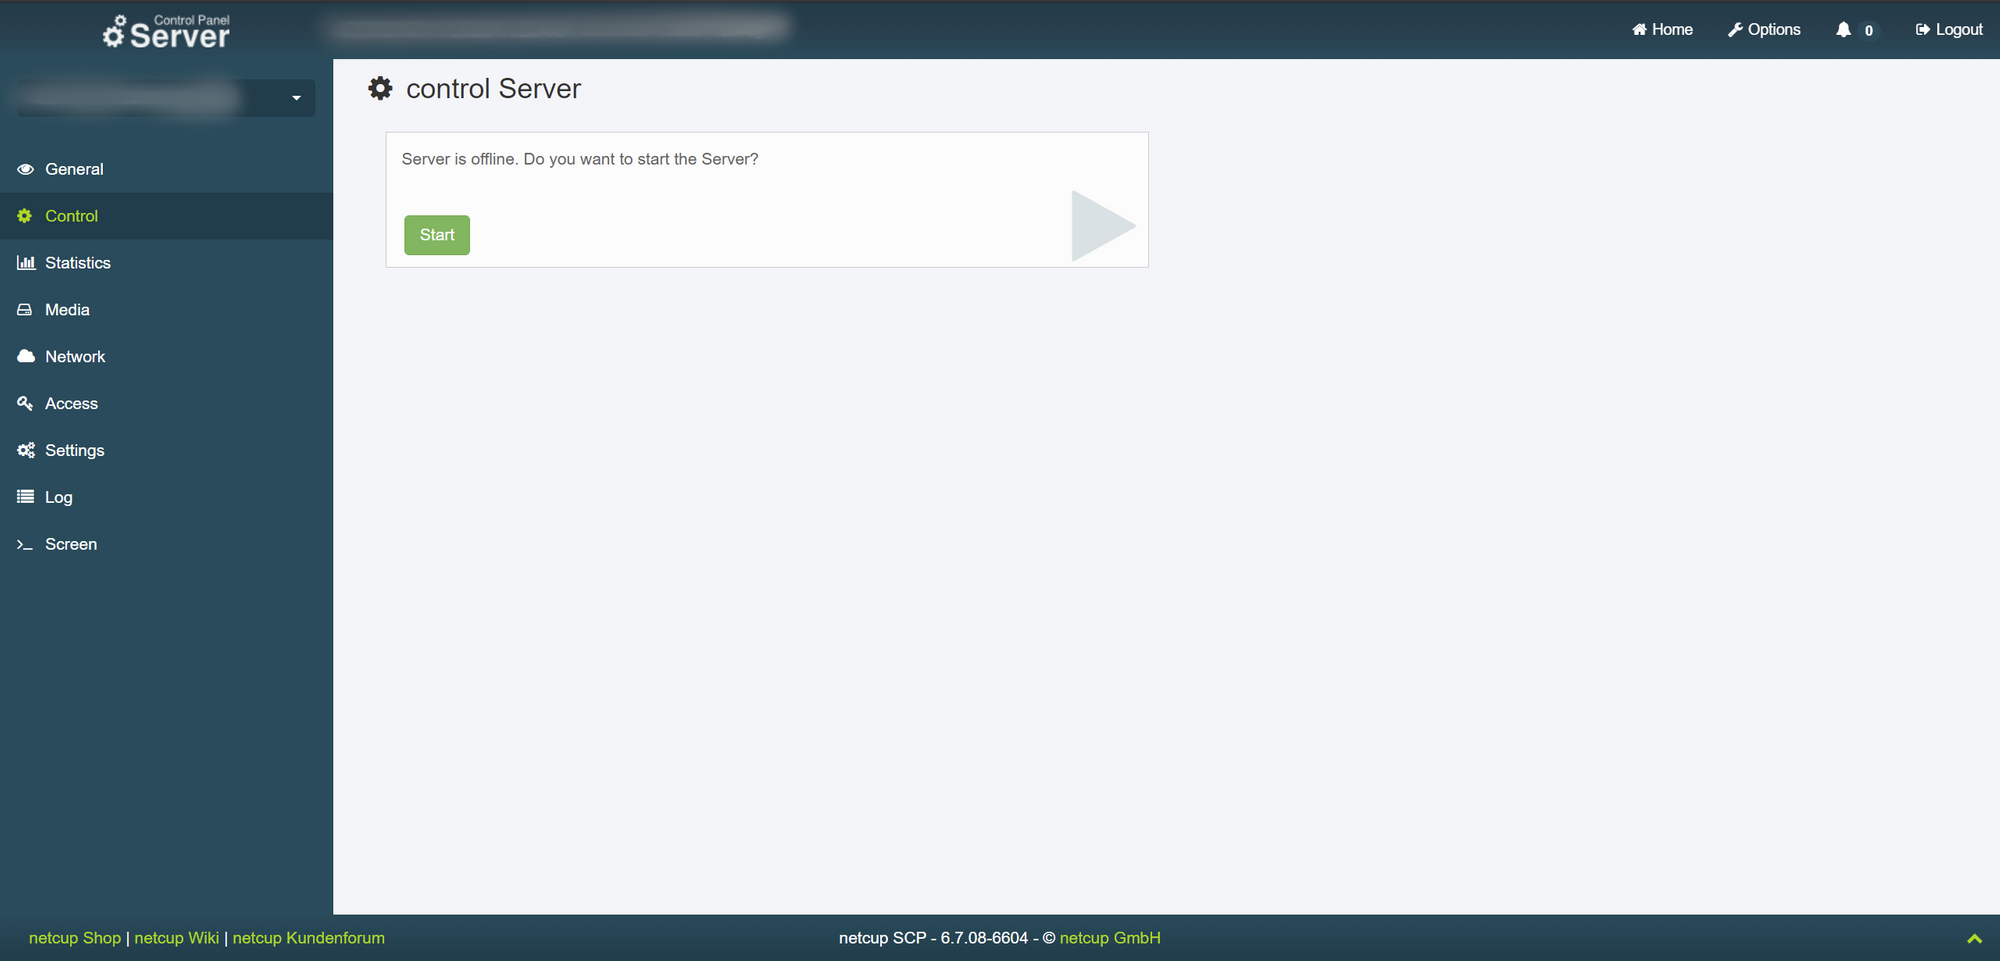
After that, go to the "Control" section on the left and select "Start" (Fig. 4) (if the server has already started with the default Netcup image, select "Force Stop" and then click the "Start" button) .
To get things rolling right, we finally need to go back to the General taband click on the newly displayed VNC window (Fig. 5).

Step 3: Setting up language, location and keymap
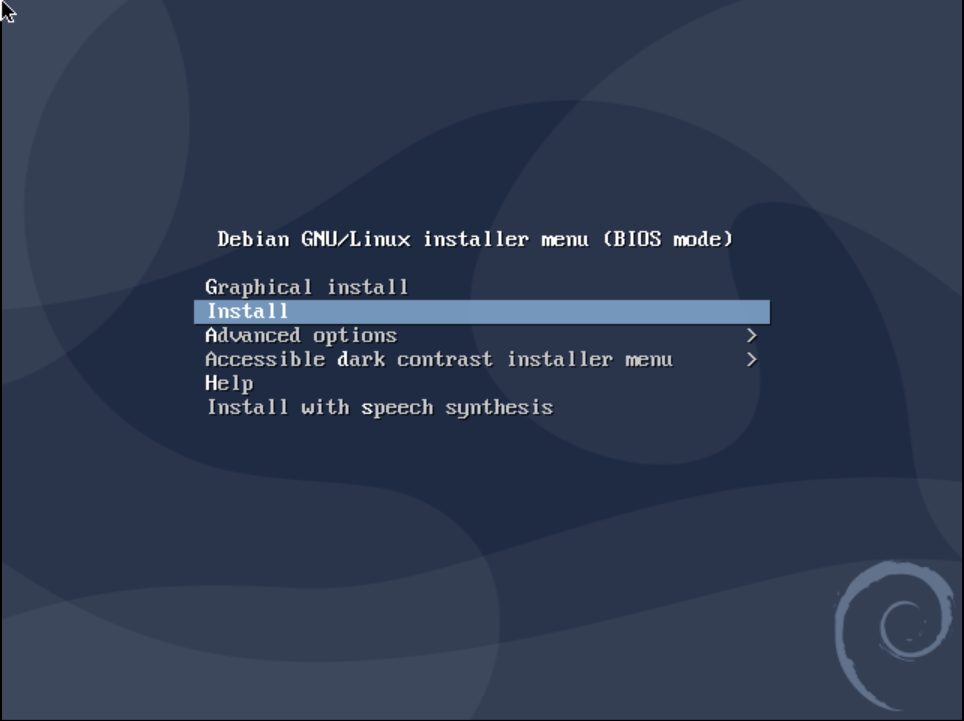
Now that we are in the VNC window of our own VPS, we can interact with the machine using both our mouse and our keyboard. You can now choose either the graphical installation- or the "classic" installation process. Both behave very similarly and only differ in their visual appearance. This guide will follow with the classic installation. However, you can proceed with the graphical installation process if you wish.

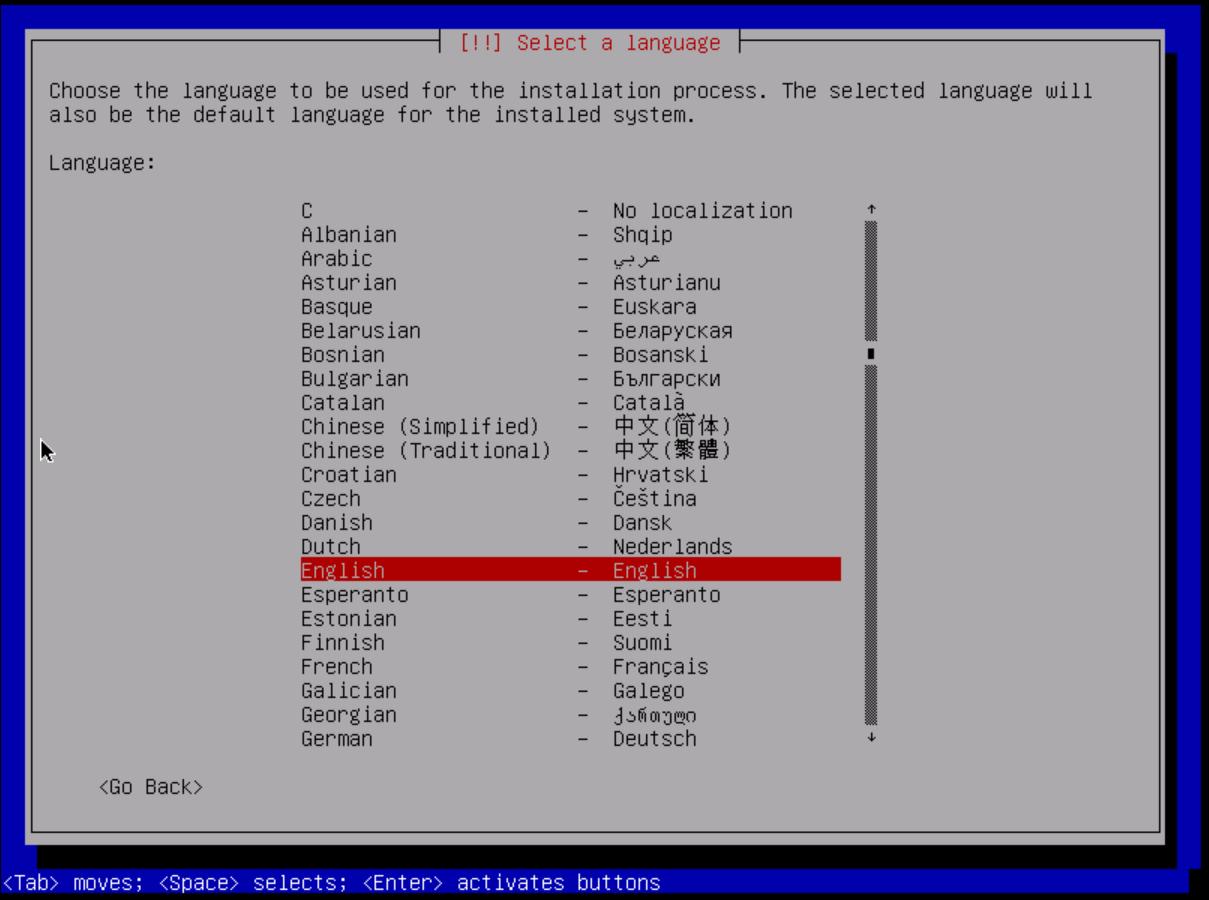
Now that the installer has loaded, we need to set our language for the installation process. This language does not affect the later installed system and is only used for the installation environment.
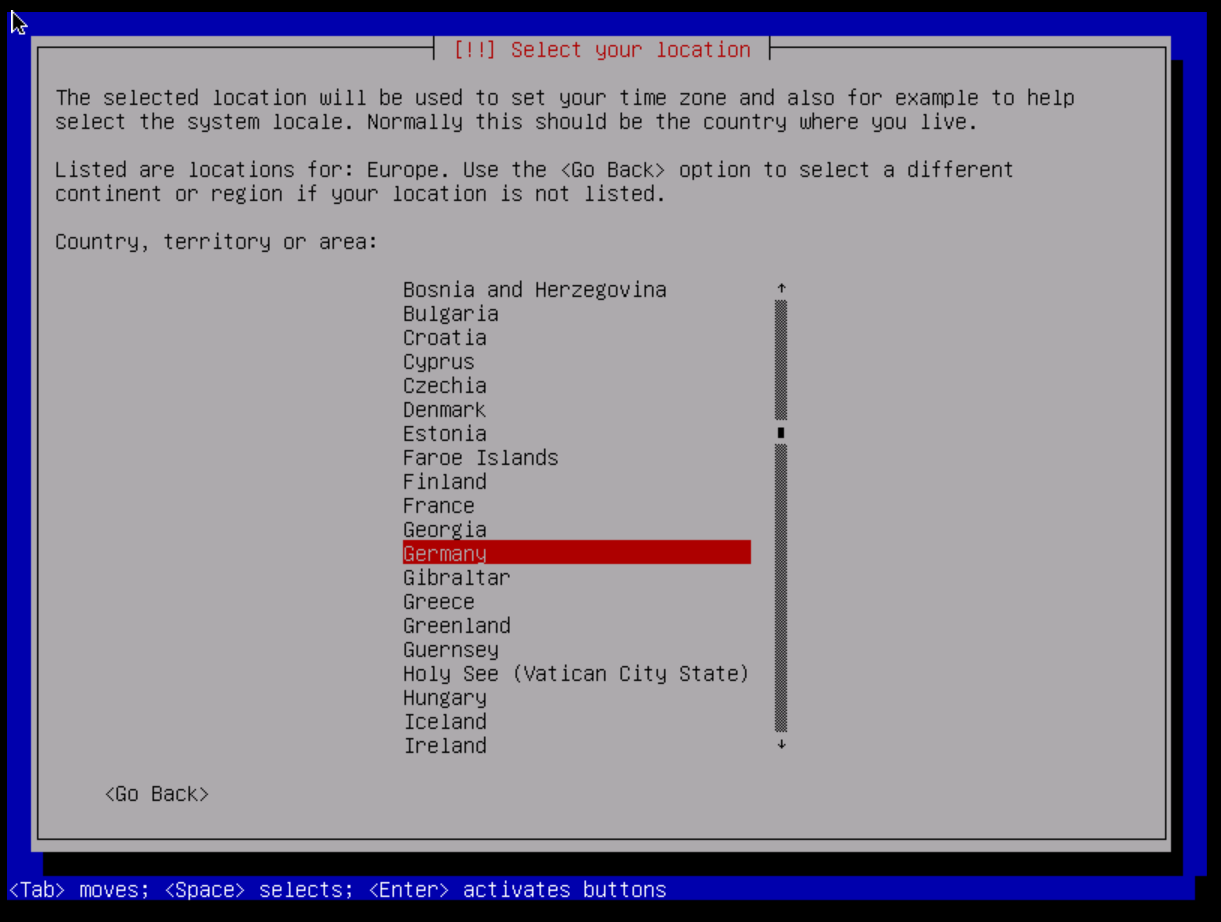
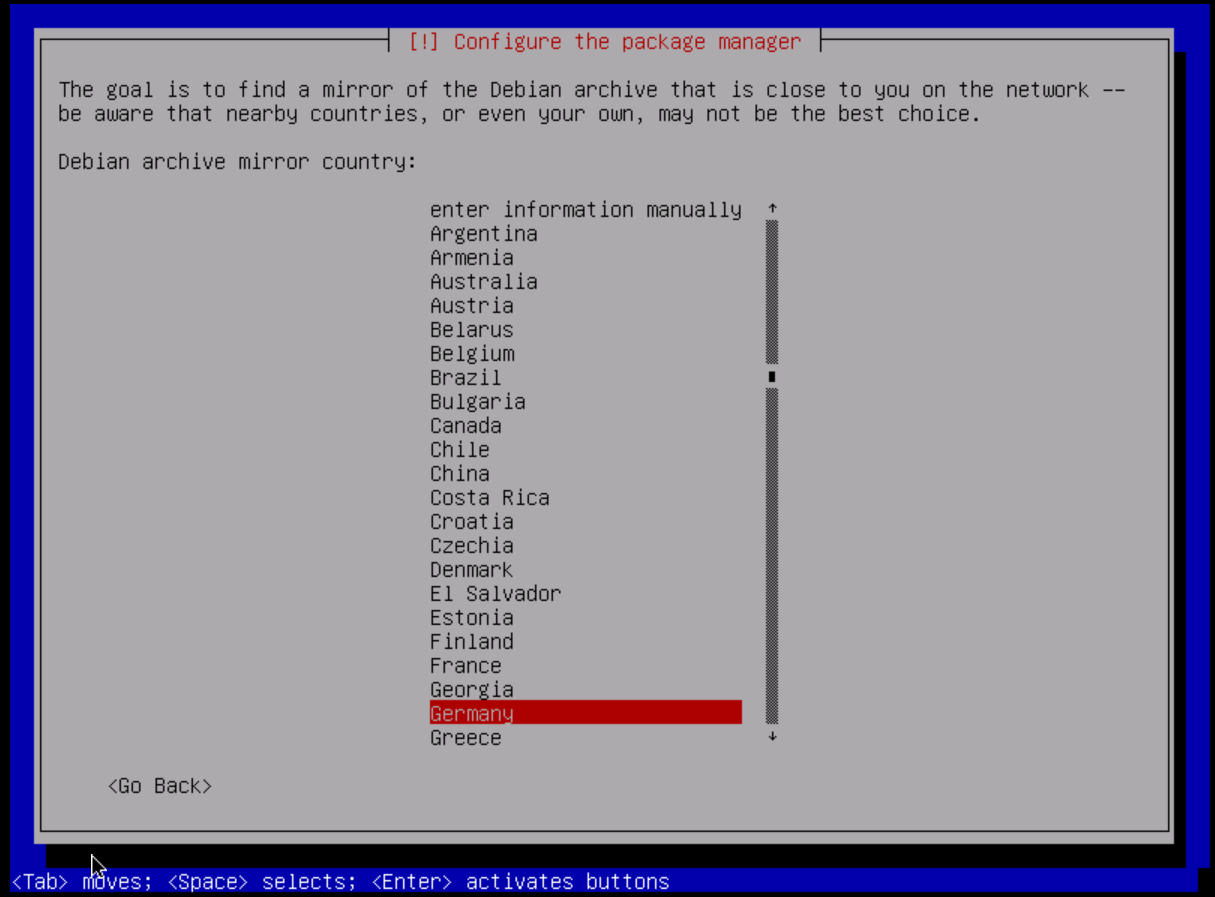
After that we need to choose our country or area where the server is hosted. This will help us choose our language and will set our time zone to match the range selected. Since netcup provides servers mainly in Germany (like this server), I will select Germany as the area.
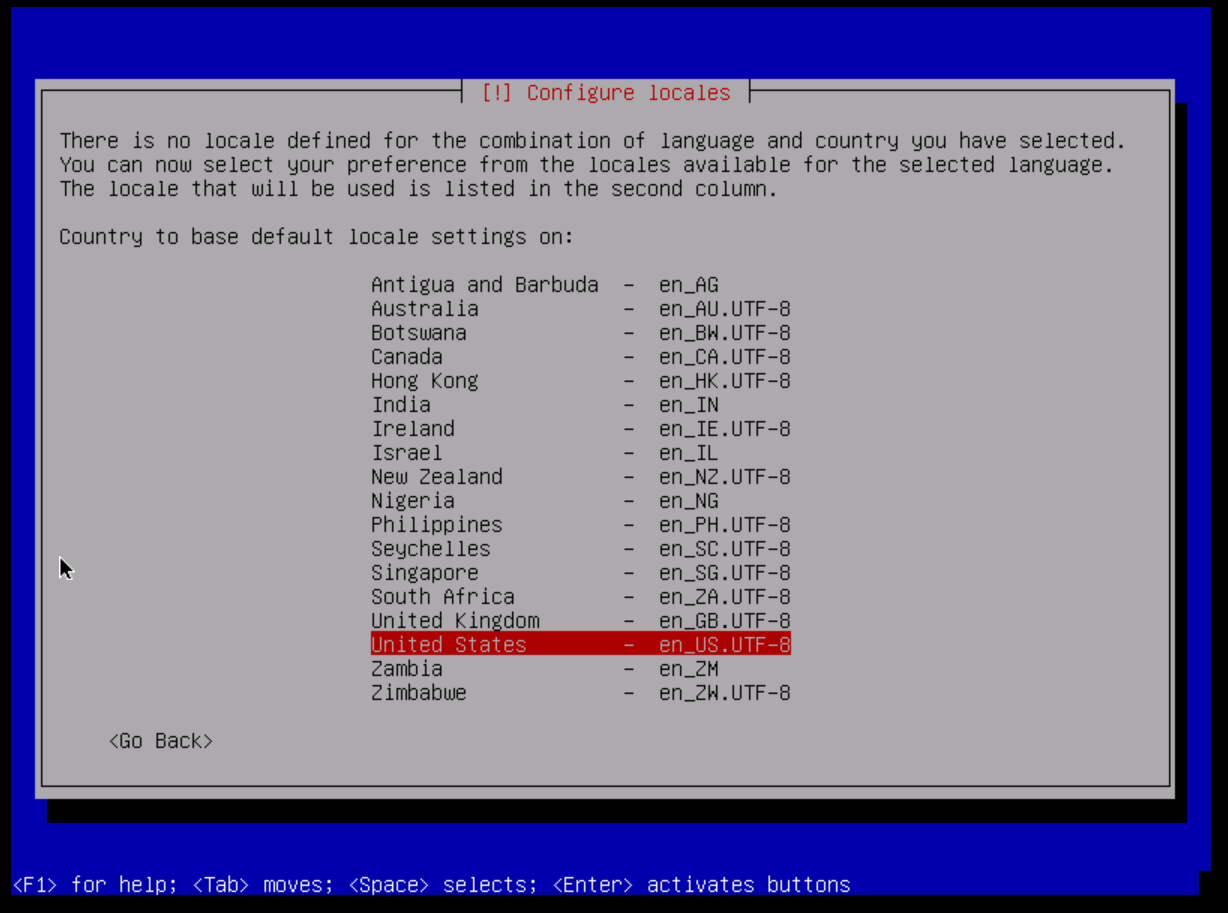
Next we choose the locale that will be used later on the server. Since I prefer English systems (for internationalization and for easier debugging), I recommend choosing either en_US.UTF-8 or en_GB.UTF-8. Note that not all programs you may encounter do support a language other than English, but it's up to you.
Since we want to get our key layout correct, we need to select the appropriate keyboard layout. For me it's the German standard, but yours might be different.
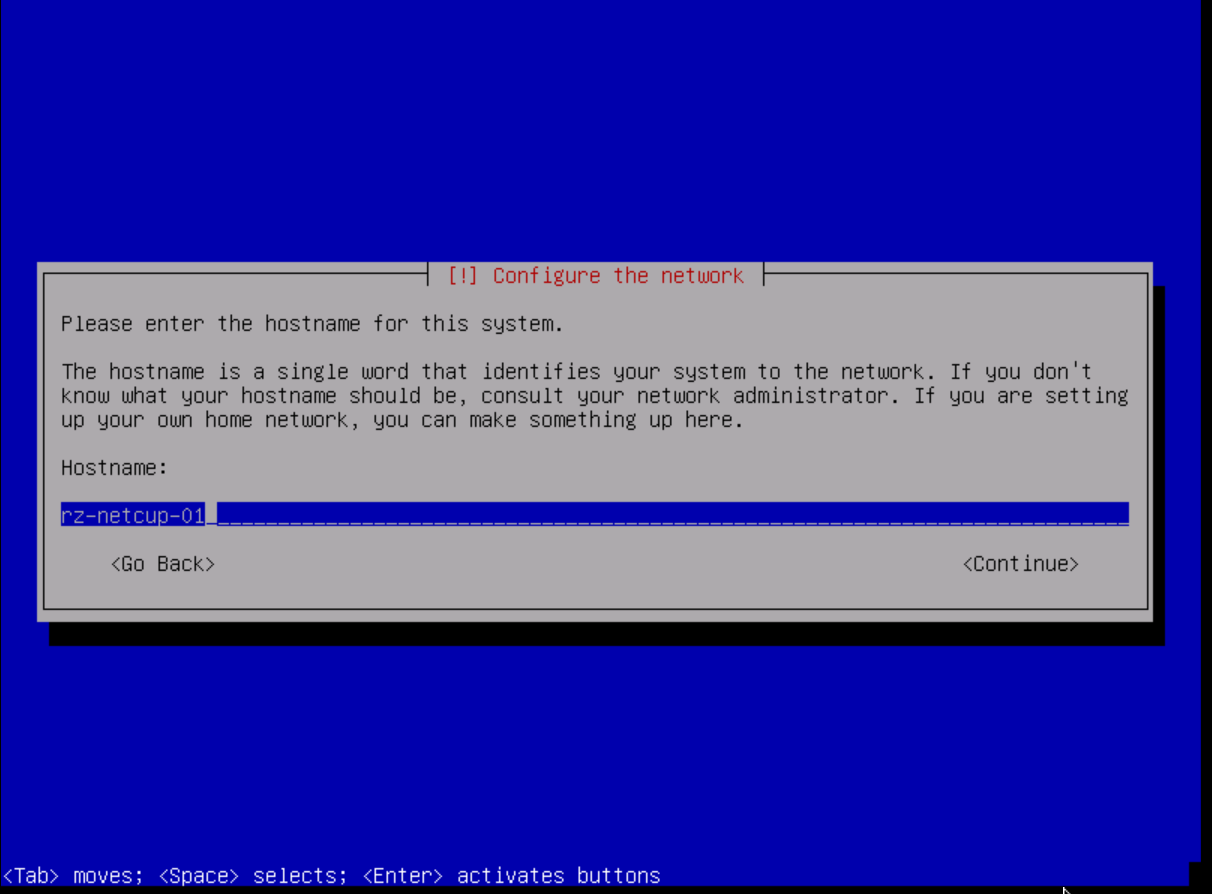
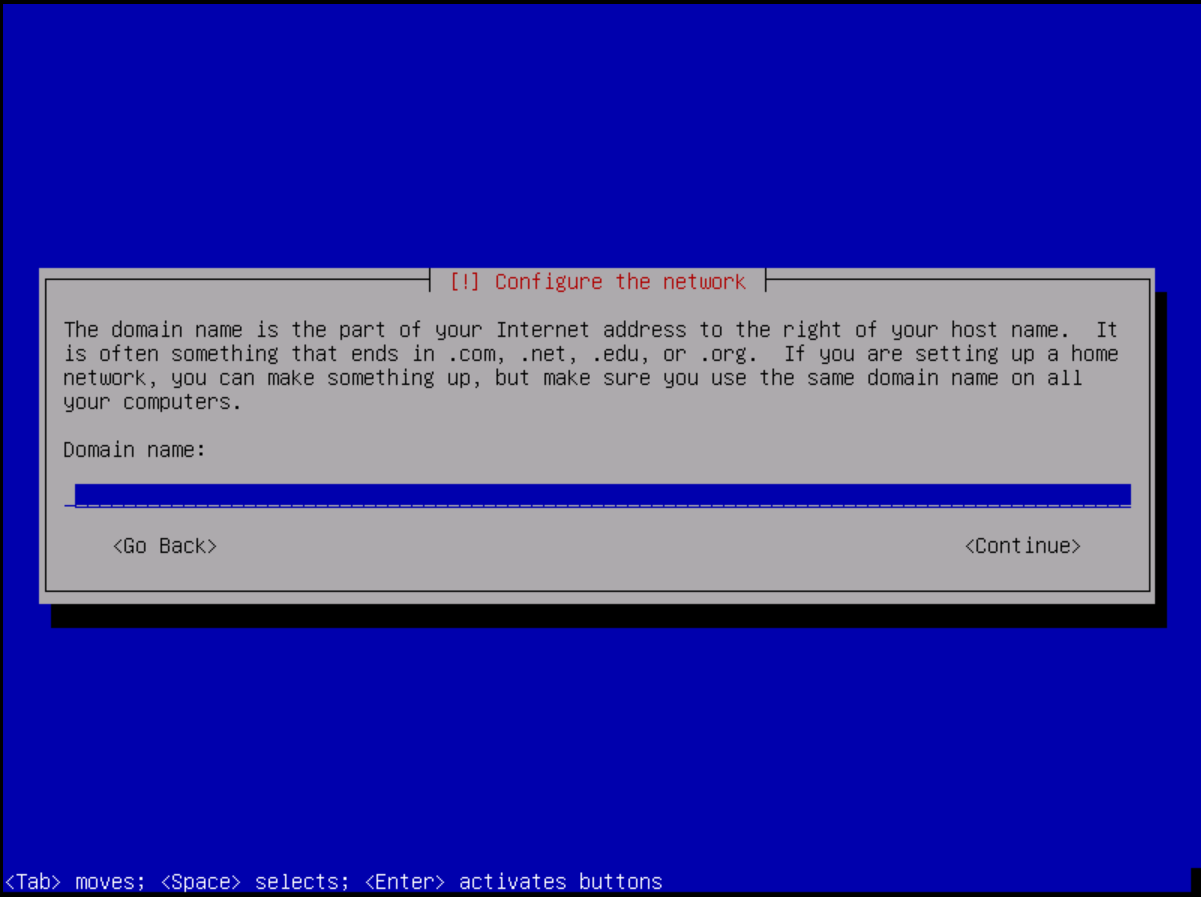
Step 4: Configure the Network
We need a configuration to connect to the internet and identify ourselves with the other machines. The first thing we need to set is our hostname. The host name is a simple name or word (just a single word) used to identify us on the network. You should think about it a little as it should be recognizable and easy to remember. For our guide here I chose rz-netcup-01 (rz stands for "Rechenzentrum", which means "datacenter" in English; "netcup" was selected because this server is hosted by netcup; "01" is only there for numbering reasons as this is the first server we will set up here, but I recommend incrementing this number if you are setting up multiple server instances.)
Next comes the domain name. If you plan to use a domain with the server, I recommend adding that here as well. But it's not bad to leave it blank. You can also change it later on.
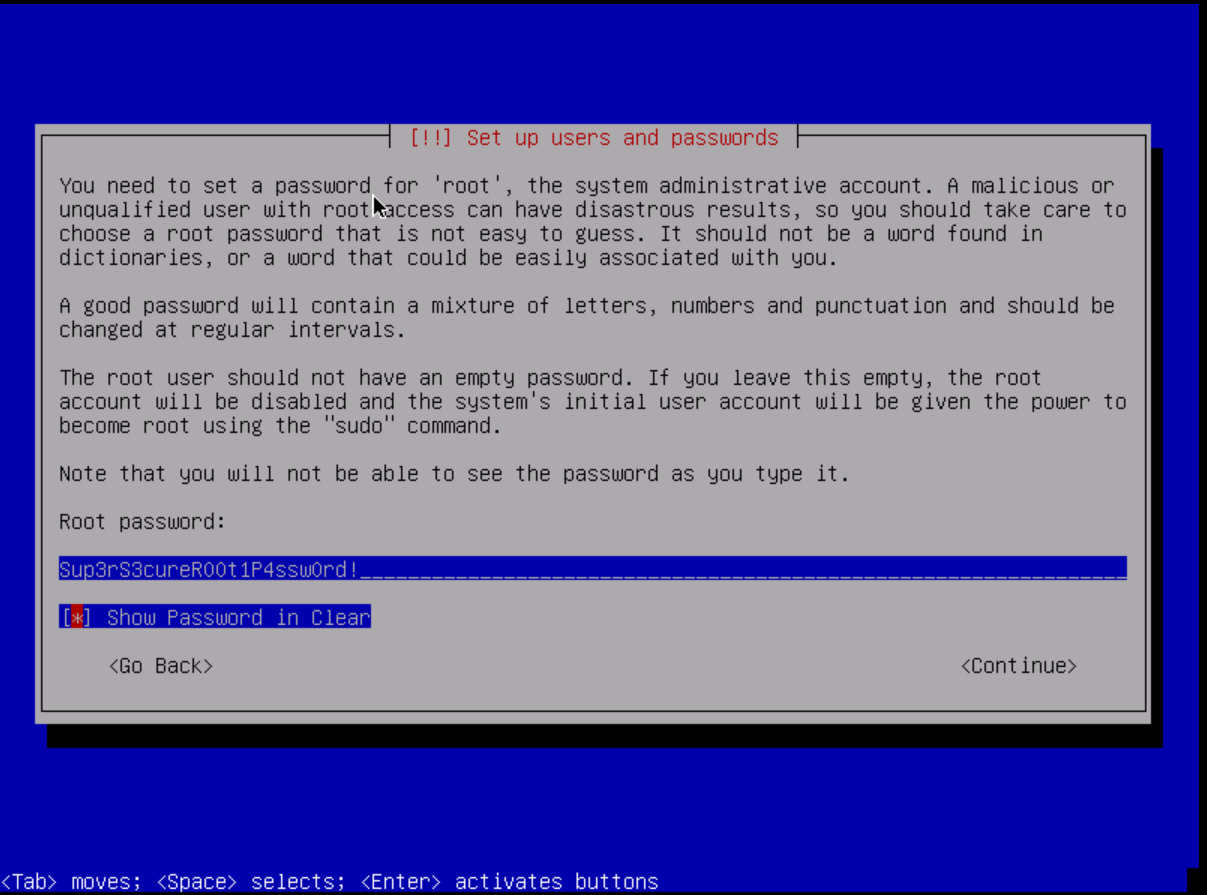
Step 5: Set up users and passwords
First, let's set a super secure password for our root user. It is the most powerful user of our system and should only be used during the initial setup. Otherwise, I recommend invoking privileged commands with the sudo command. I recommend generating a random password for the root user. DuckDuckGo offers a great mechanism for that: Password Generator.
Now let's verify the password by typing it in again.

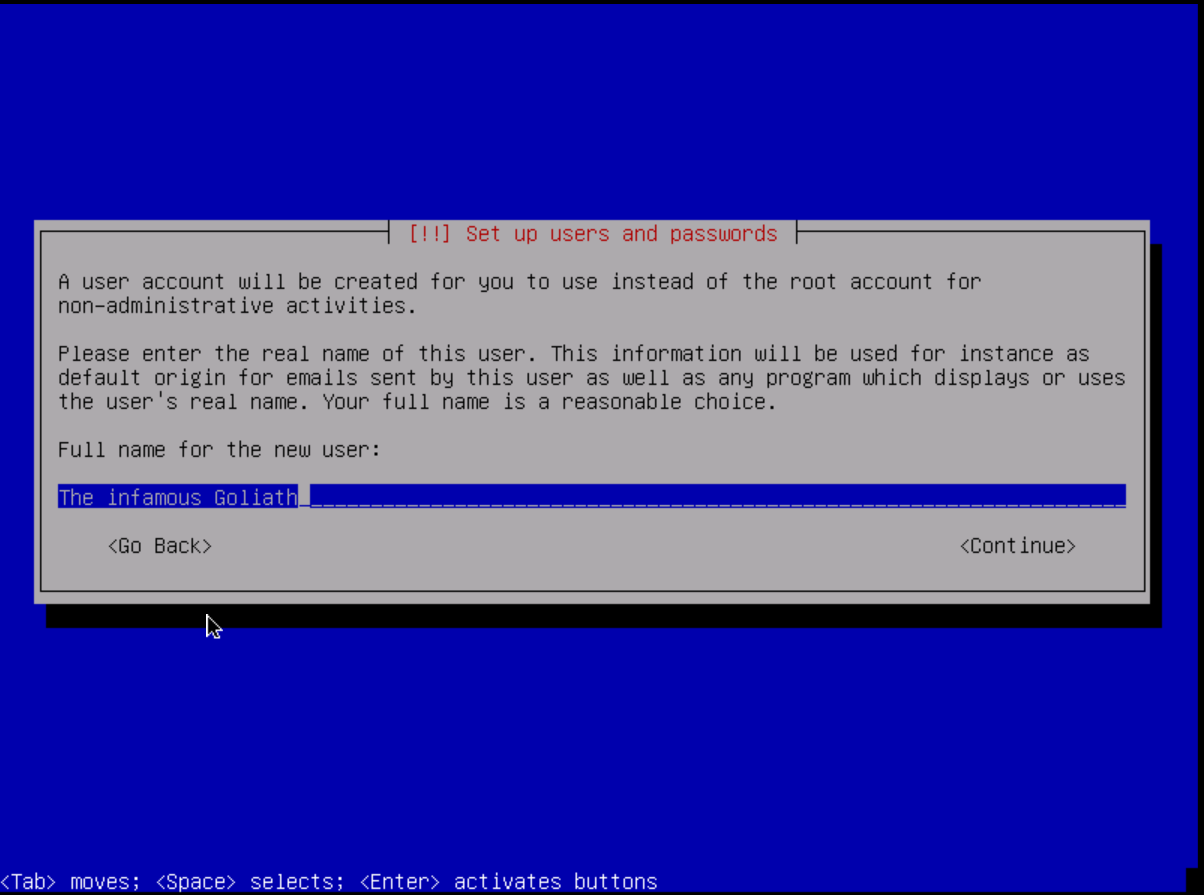
Running things as root is not good practice. You therefore need a UNIX account that we can work with. This can be your pseudonym or your real name. For systems with more than two users, I recommend using your real names to get the relationships between usernames and the people behind them right.
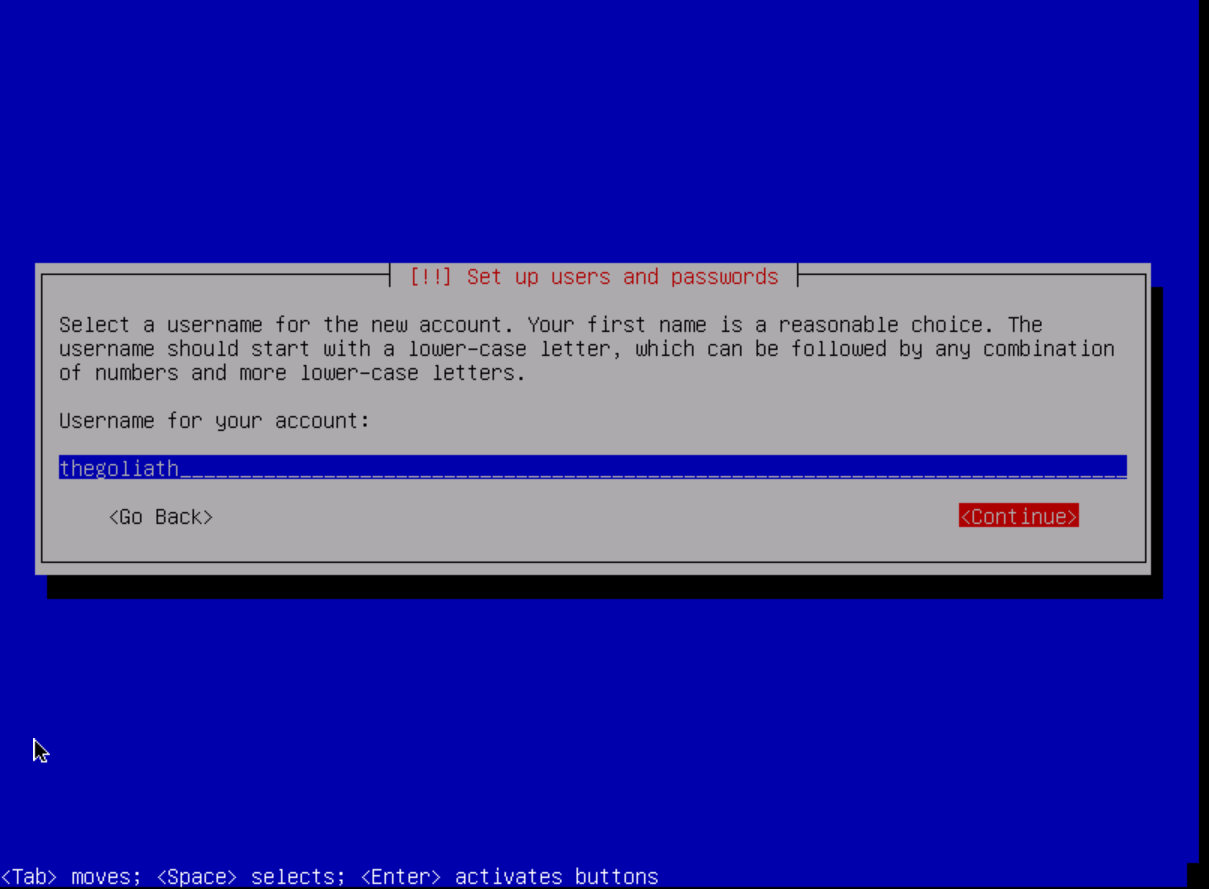
Now choose a username for the account. Either go for your pseudonym or I recommend using the 5 letters of your last name and 3 of your first name. (e.g. Jeff Hawkins becomes "hawkijeff").
As with the root user, we must also provide a secure password for the user. Mine in this tutorial is not secure at all. Please use a different one!
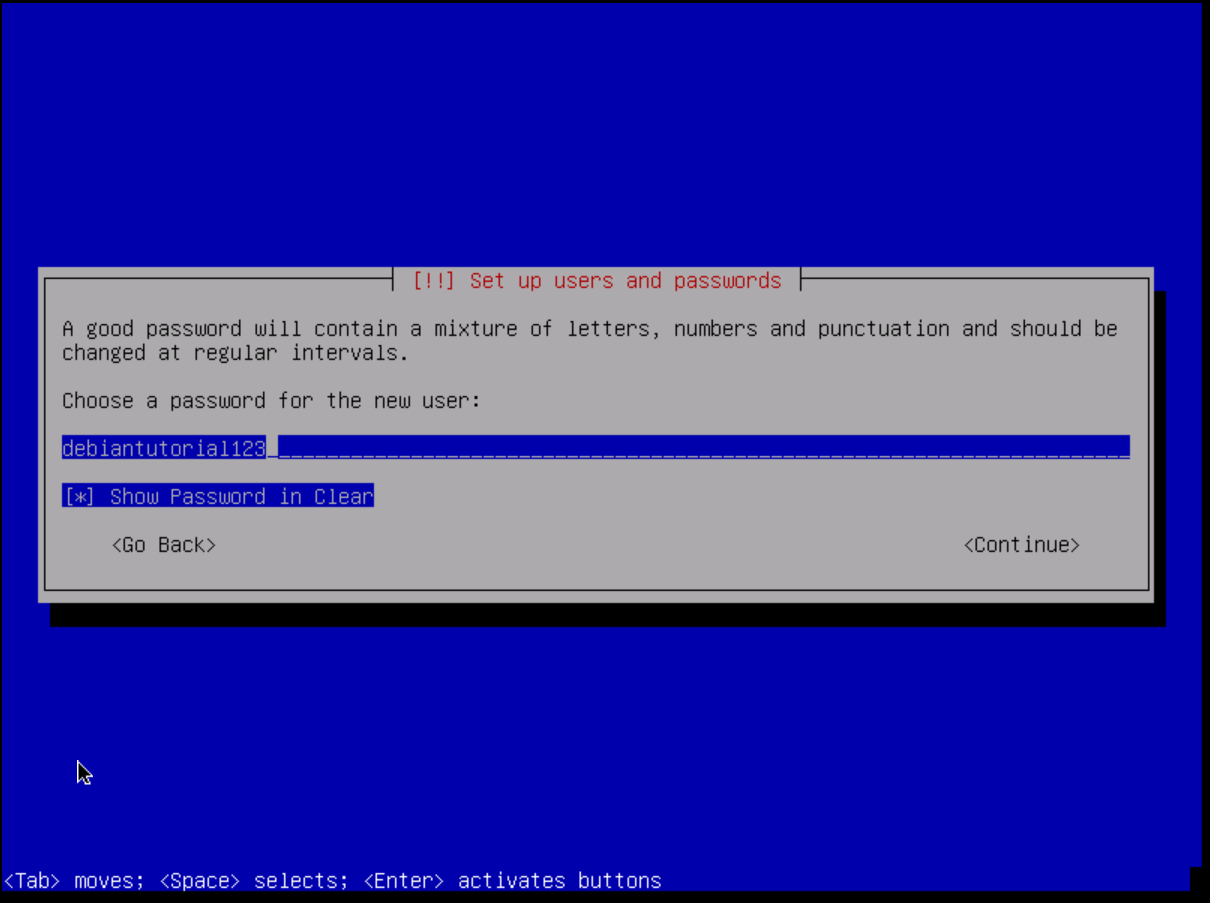
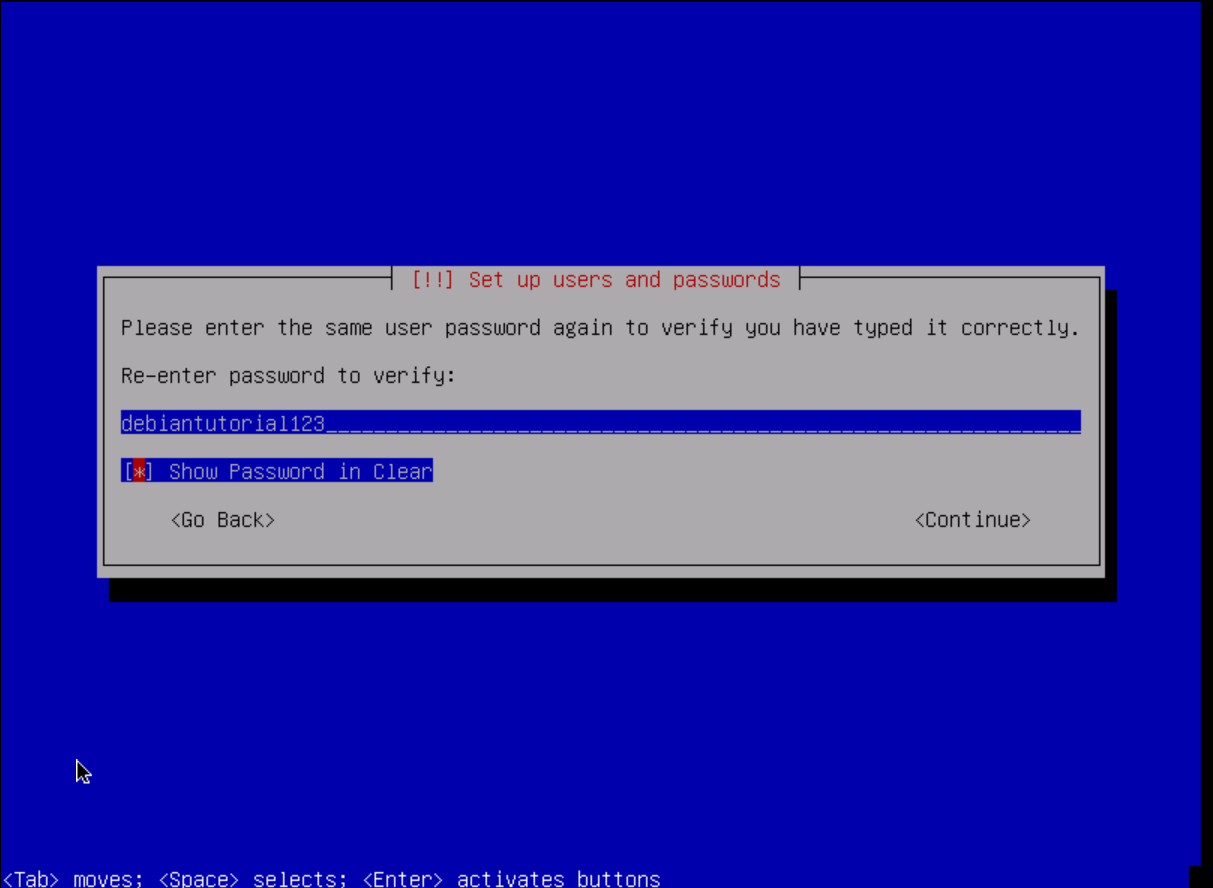
Please check your password now so that we don't get locked out from the system after the restart. Write it down or copy it to your password manager!
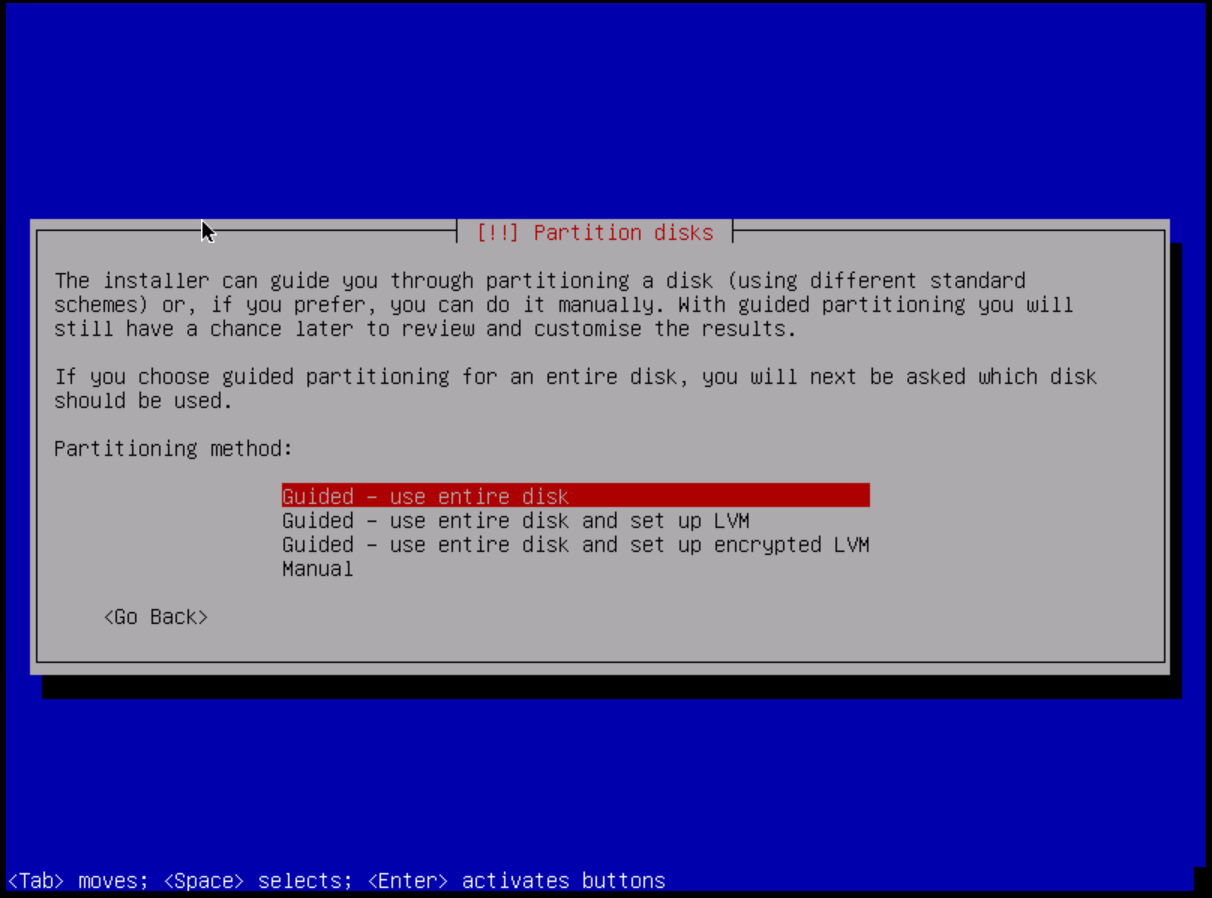
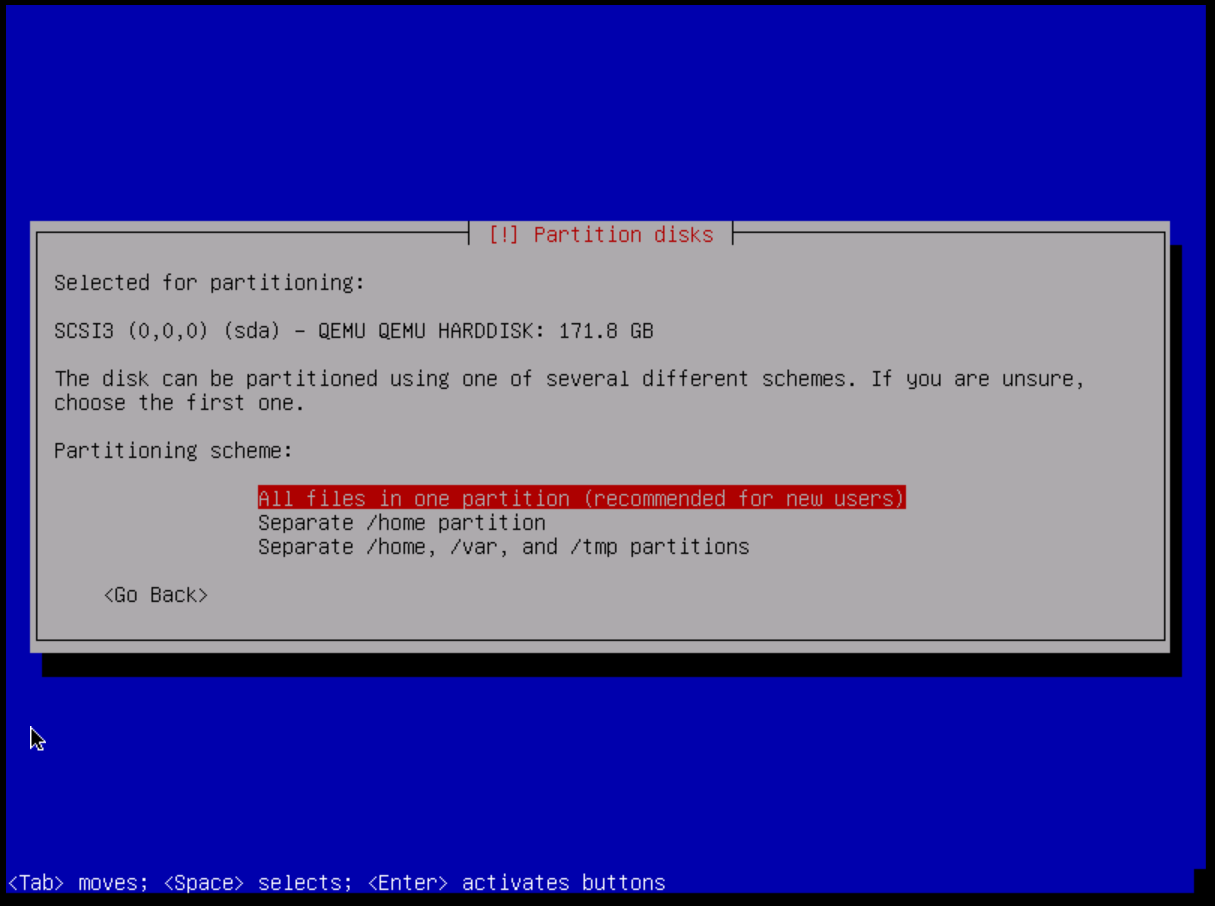
Step 6: Partition the disks for the system
To get started, we need to give our system some space to install its components. I recommend the "Guided - use entire disk" option. If you are more experienced and want to set up LVM or full disk encryption or use different filesystems, you can choose the latter options below.
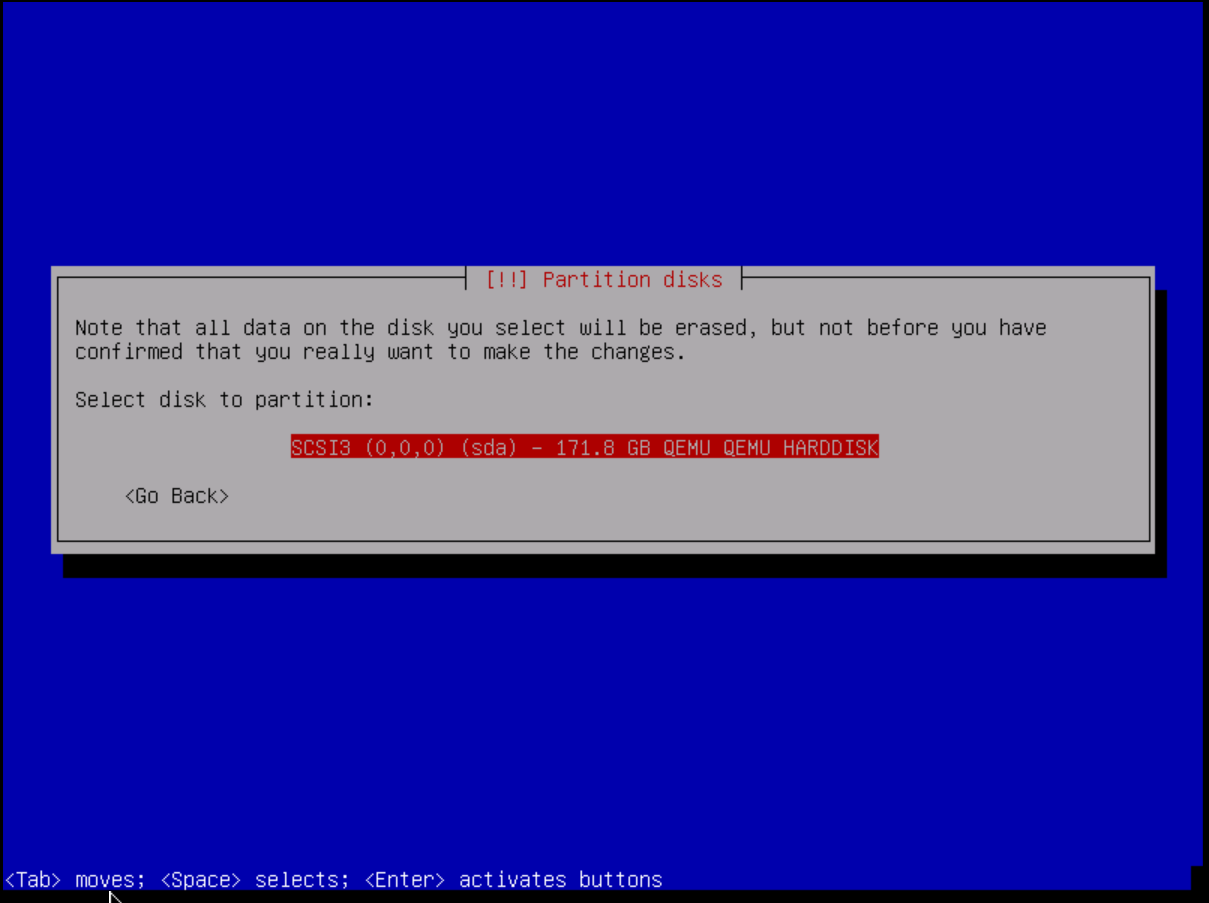
Now let's specify the hard drive that we want to partition. Please make sure you choose the correct one. Otherwise data may be lost. There is usually no more than one storage device on netcup servers.
I recommend using one partition for all files. However, there is not much difference between using separate partitions for the home or temporary directory. It's up to you.
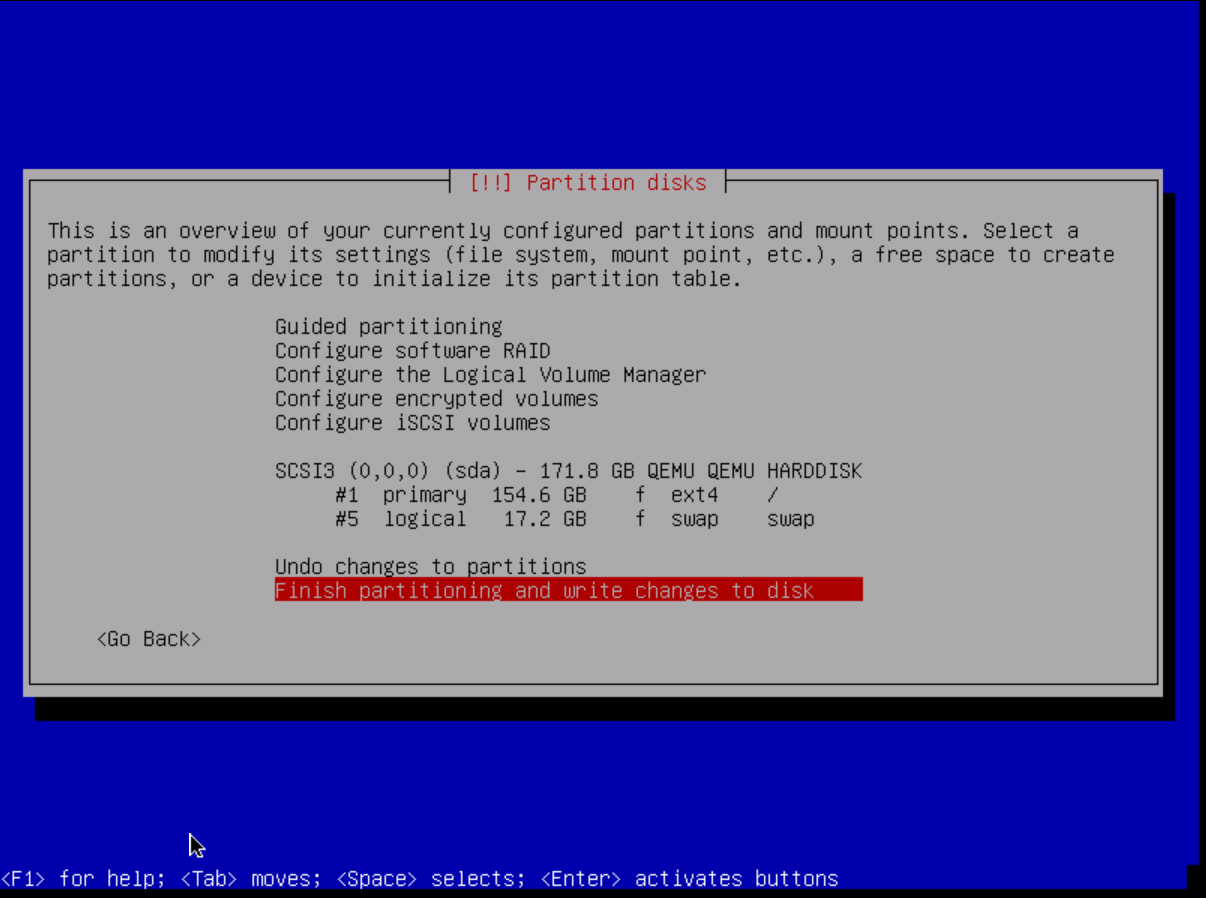
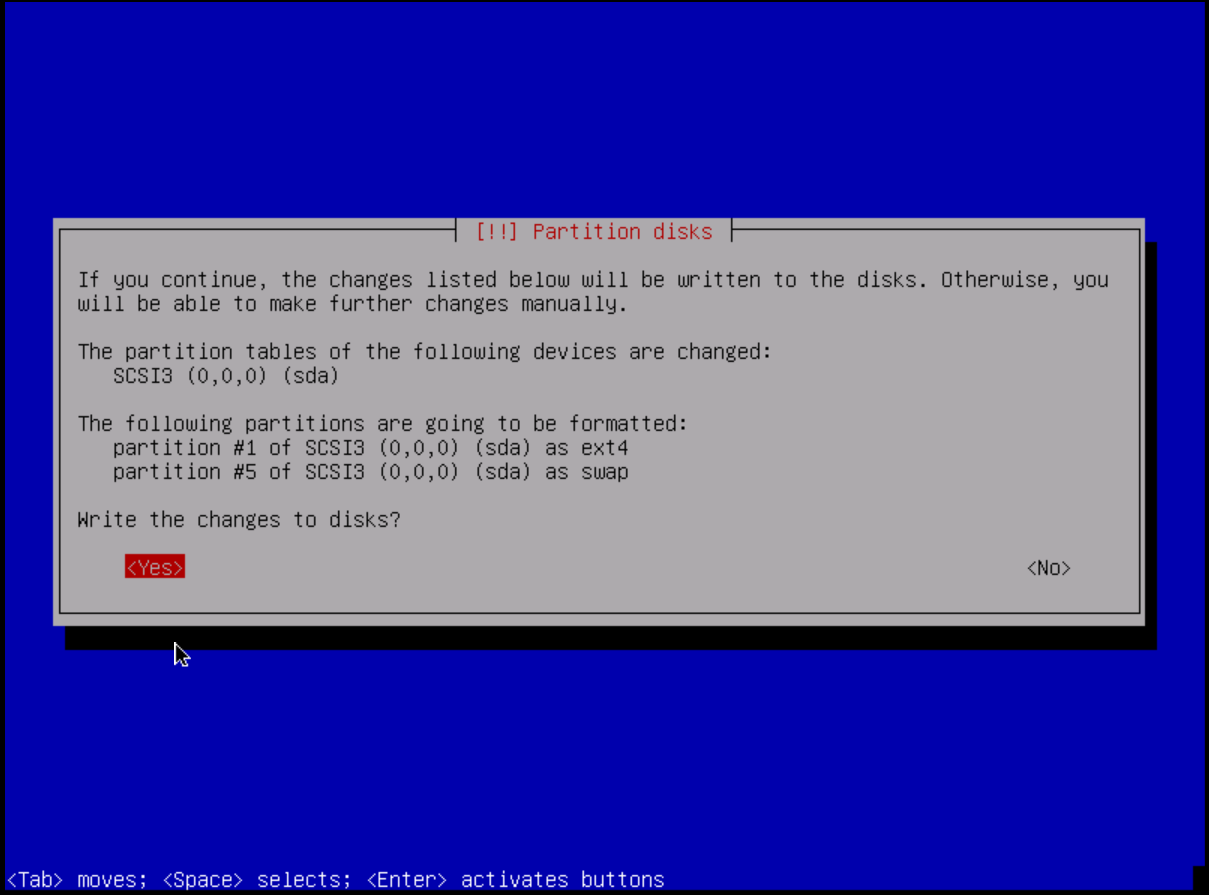
To complete the partitioning, we confirm the changes by pressing "Finish partitioning and write changes to disk" and then confirm our selection by pressing "<yes>".
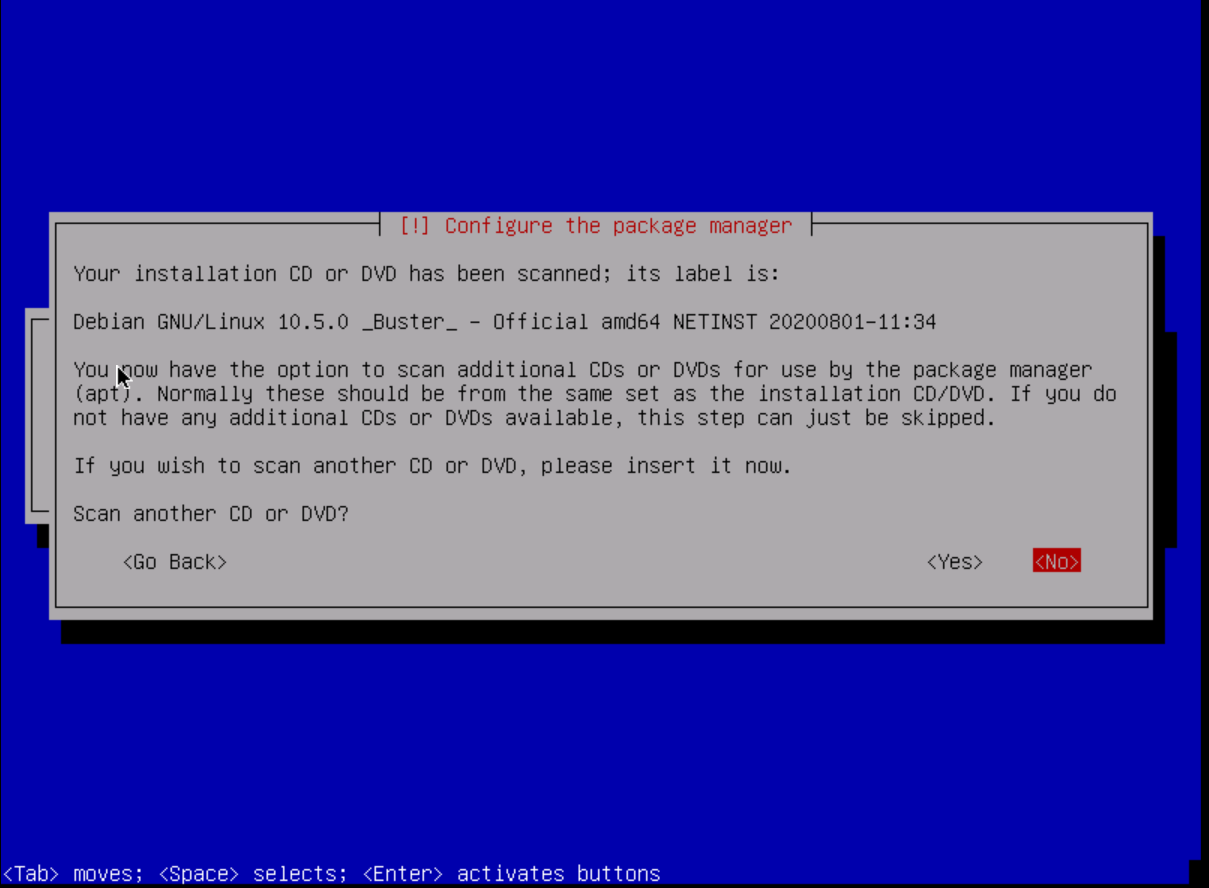
Step 7: Configure the package manager
We are now asked if we would like to scan another DVD / CD so that our package manager can use it. Since we don't need any proprietary drivers for our server to operate properly or other packages that are not available through the apt package manager, we choose the option <no>.
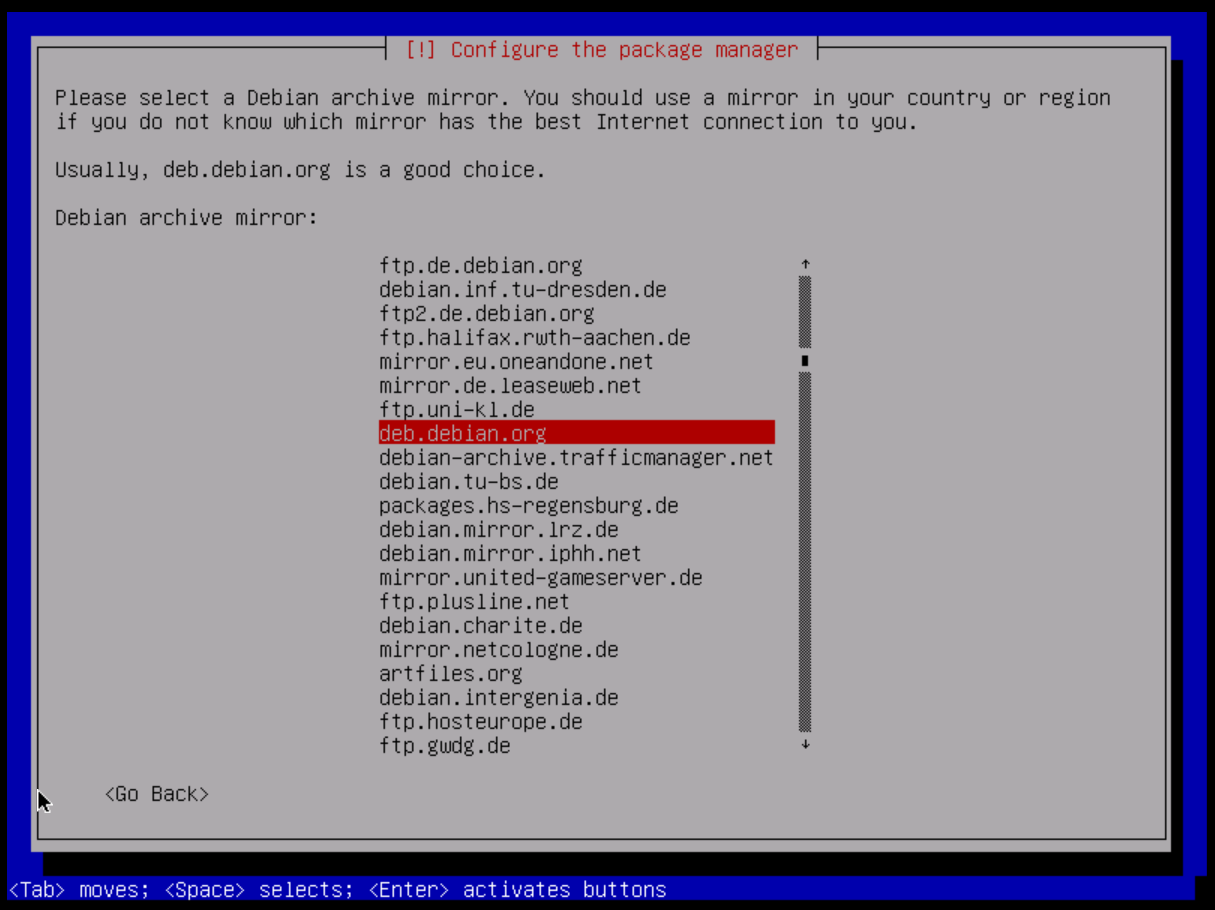
As with the location and language, we should now specify the area that is closest to our server (so that our package downloads are not slow). I'm going to select Germany here and then choose "deb.debian.org" which will automatically select the best mirrors for me.
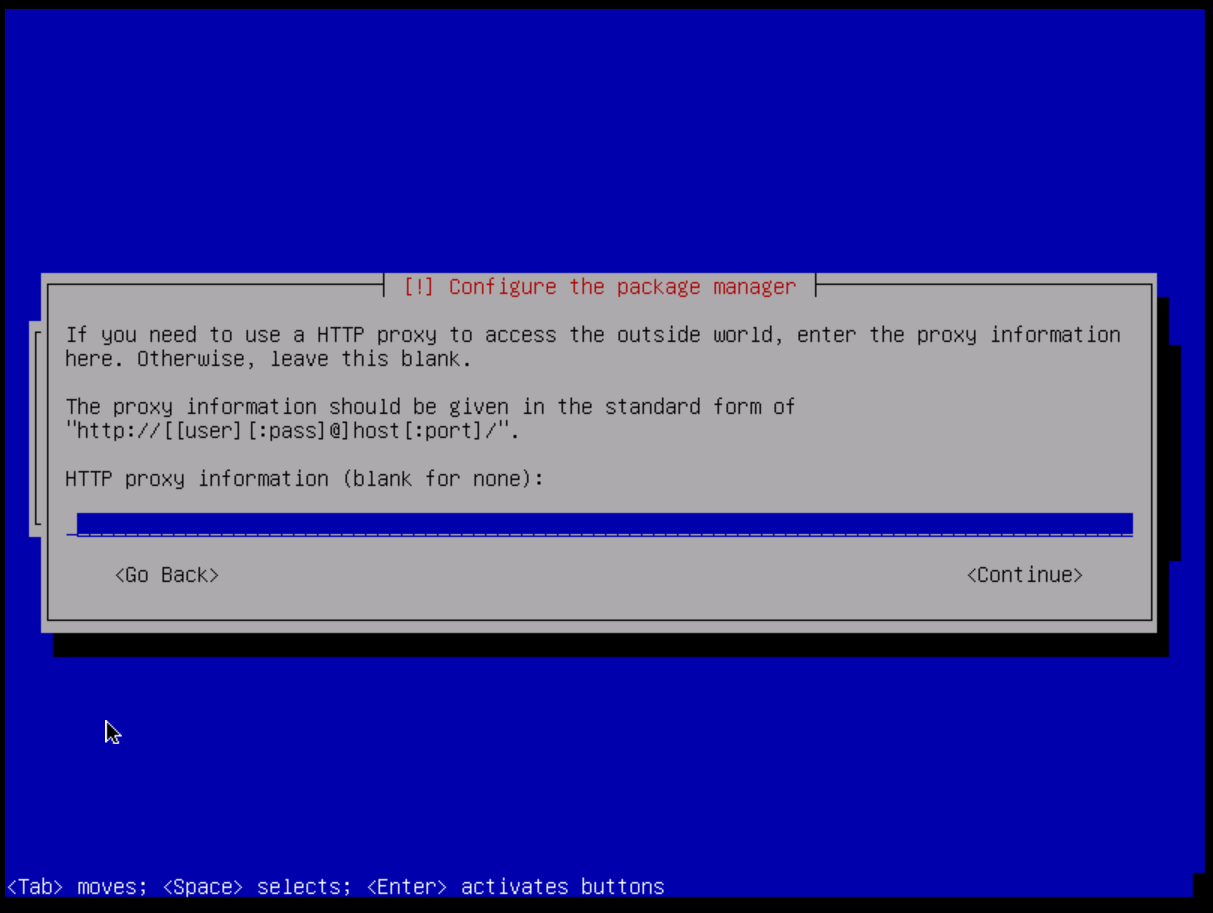
I don't recommend using an HTTP proxy for the apt package manager. If for any reason you would like to use it, you can enter the appropriate information in the field as described by the installer. Otherwise, you can leave the field blank and press Enter.
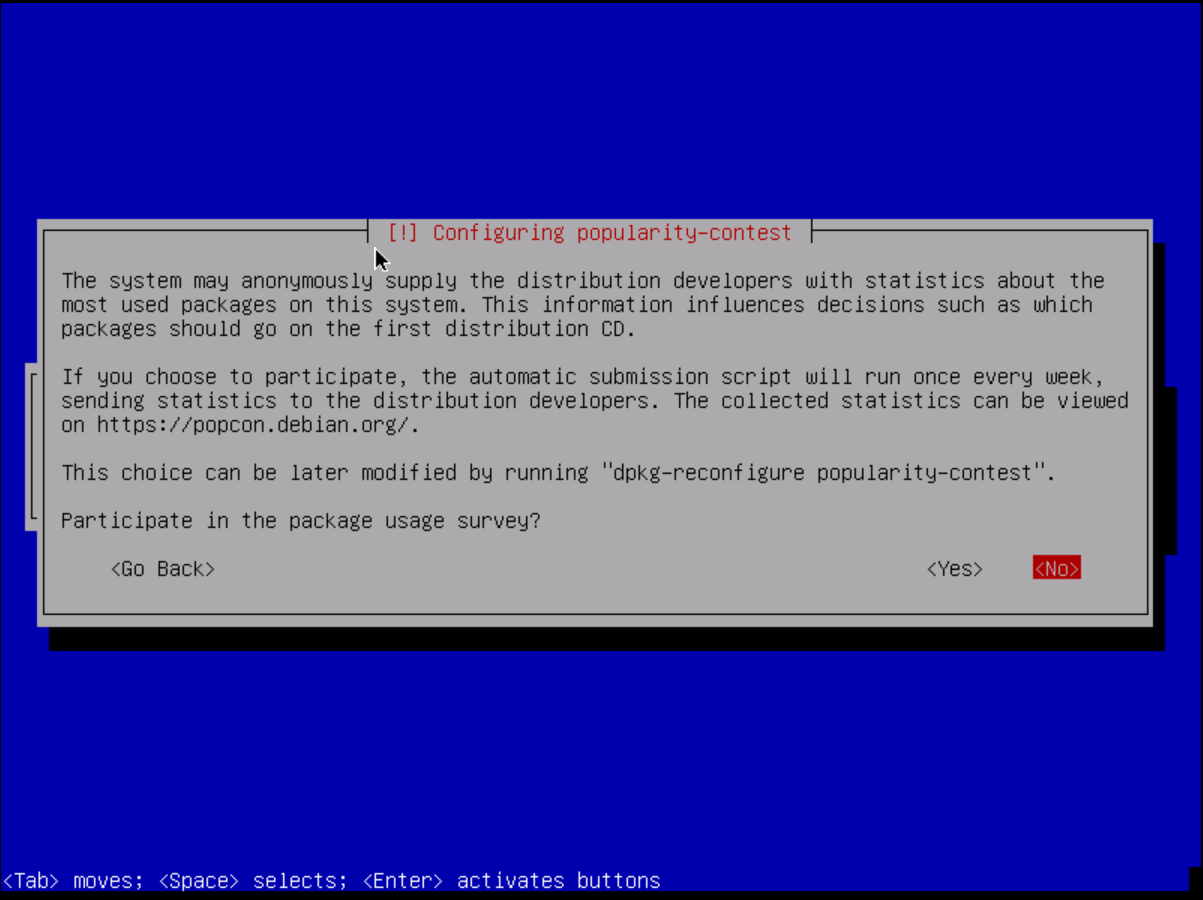
You can participate in Debian's popularity contest. It is anonymous and provides statistics to distribution developers on which packages are used and downloaded most often. It is up to you whether you want to help them or not.
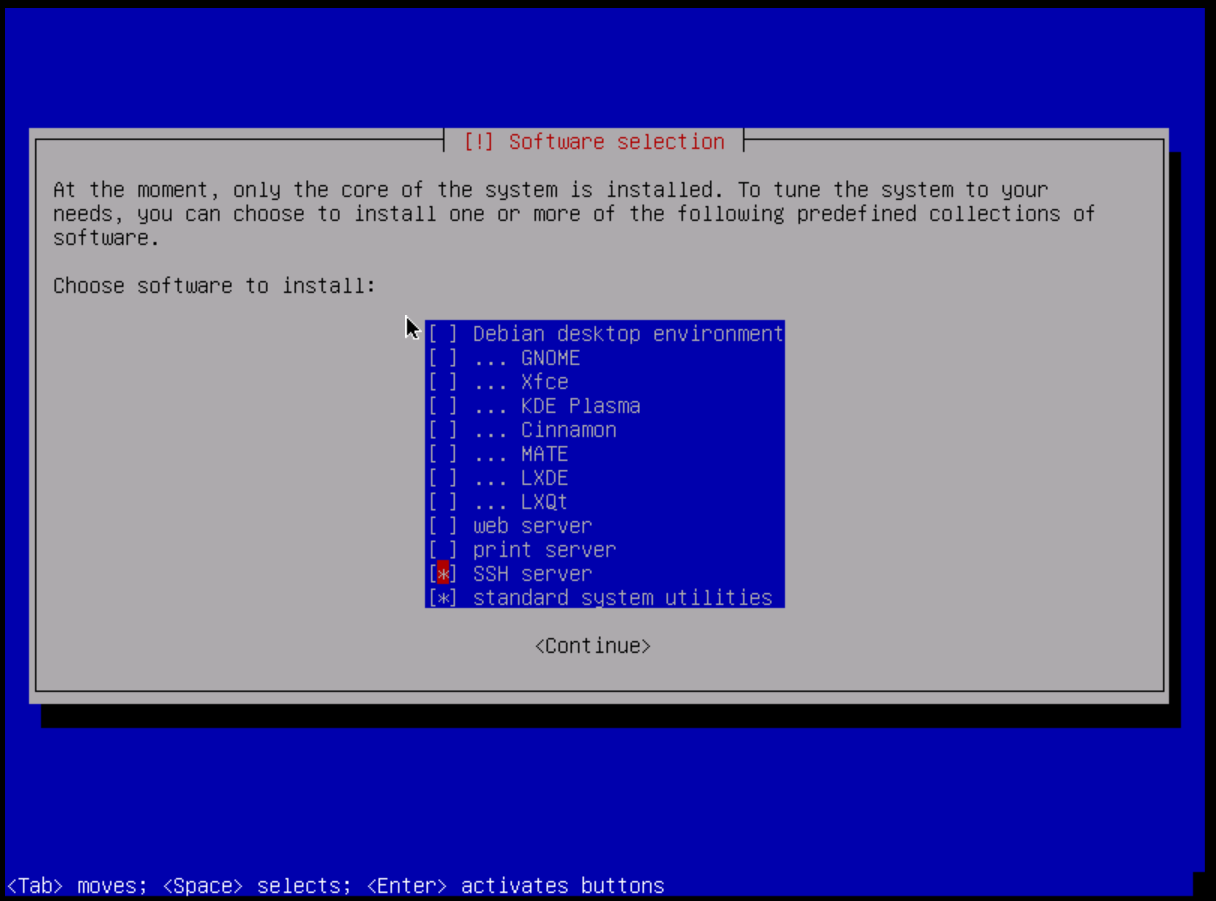
Now we select the "basic" software packages / suites that we would like to have on our system. For servers, it is advisable not to install a desktop environment. It is recommended to run an SSH server. I personally deselected the web server (as I don't really like Apache) and the print server because it doesn't make that much sense to run a print server on a computer outside of your home or corporate network.
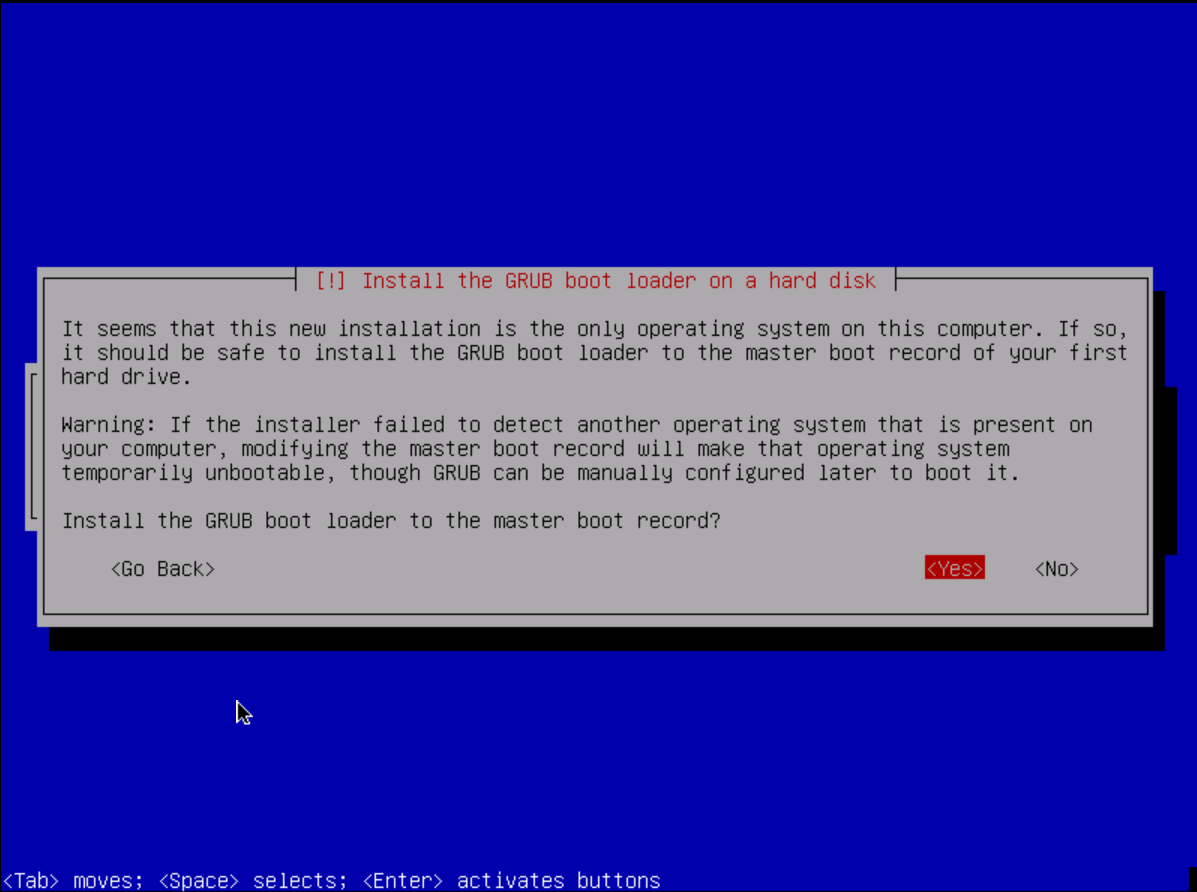
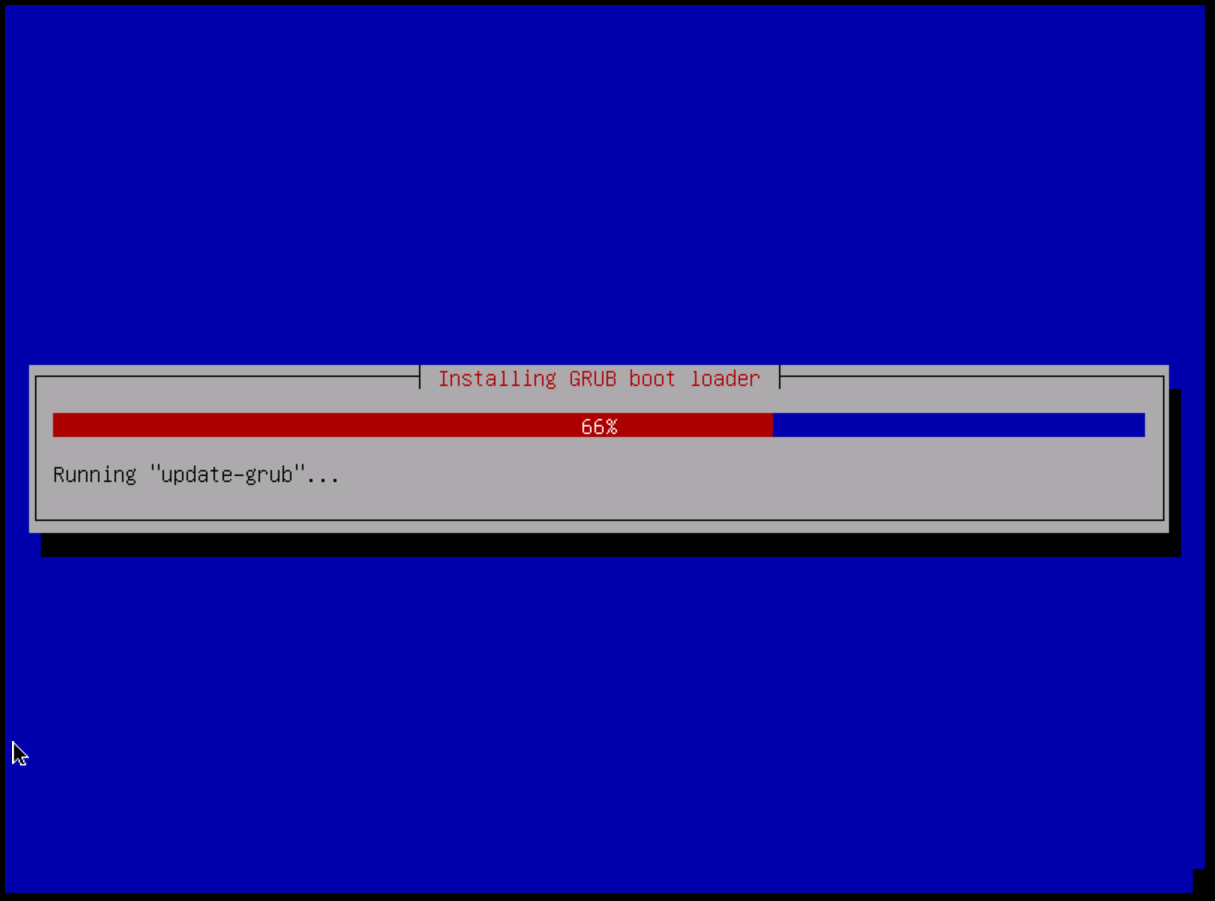
After a little while the packages have been installed and configured properly. We now have to install our bootloader to the disk. Debian uses GRUB 2 by default. We want to install it to our master boot record (MBR). So press yes.
After that we finally installed our own VPS. We must now select "Reboot" and then remove the installation media from within the server control panel (SCP).
After that, go to the General tab and look at the VNC console to see if we rebooted into the installation media or the Debian system itself. If it is still in the selection menu of the installation program, you can select the "Force reset" option in the Control tab. After doing this, your VPS should finally restart into the correct Debian system and you should be able to access it via
ssh YourUsername@YourIPorDomain(Please replace the username and IP with your respective parameters).
Cheers,
TheGoliath